
In some cases, converting taxonomy terms to posts can be more convenient for querying, displaying, and managing data in WordPress. Instead of working directly with taxonomy archives, you may want each term to become an individual post so you can take advantage of custom fields, flexible layouts, relationships, and advanced filtering.
However, manually creating and updating posts whenever terms change can be time-consuming and error-prone. In this tutorial, we’ll show you how to automatically sync taxonomy terms to posts, ensuring your content always stays consistent and up to date.
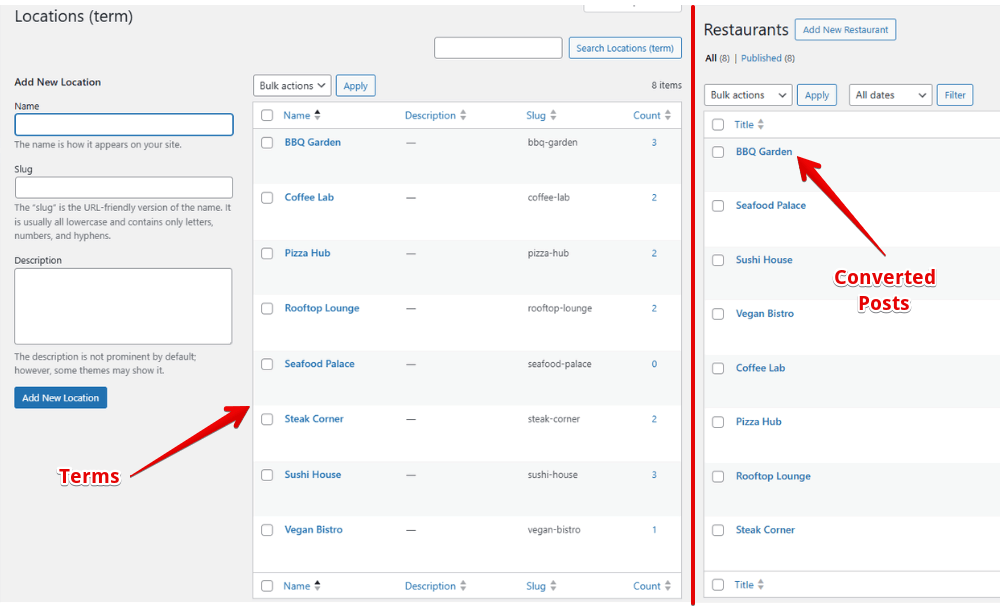
Suppose we have some terms in a custom taxonomy for the event post type. Our goal is to sync them to posts in the restaurant post type. Then, whenever you assign a term to an event, the corresponding restaurant will be automatically connected via a relationship.
The relationship will be synced exactly in any posts.
Video Version

Why Do You Need to Sync Terms to Posts?
As you may know, taxonomies are designed to label and group content. You can store a name, a slug, maybe a short description, but that’s about it.
But as your project grows, you may start to hit some limitations.
Even though you can add custom fields to taxonomy terms, they’re still designed for classification, not for representing complex data. You might find yourself needing richer information for each term, like images, maps, detailed descriptions, or even a dedicated page with a custom layout.
More importantly, when your data starts requiring flexible relationships, taxonomy can quickly become restrictive.
And instead of forcing taxonomy to handle that complexity, a better approach is to turn those terms into posts, where you have full control over data, structure, and relationships.
Additionally, in terms of querying, using posts and relationships gives you far more flexibility and control when your logic depends on rich data and relationships, while taxonomy just works well for simple filtering.
Before Getting Started
In this practice, you just need Meta Box Lite - the free version of Meta Box, but you can also install Meta Box AIO - the paid version for all of the functionalities from Meta Box extensions.
Especially, we need MB Custom Post Types and Custom Taxonomies to create the post type of the event, restaurant, and taxonomy for the event. Also, MB Relationship to create a relationship between two post types.
Now, let’s start.
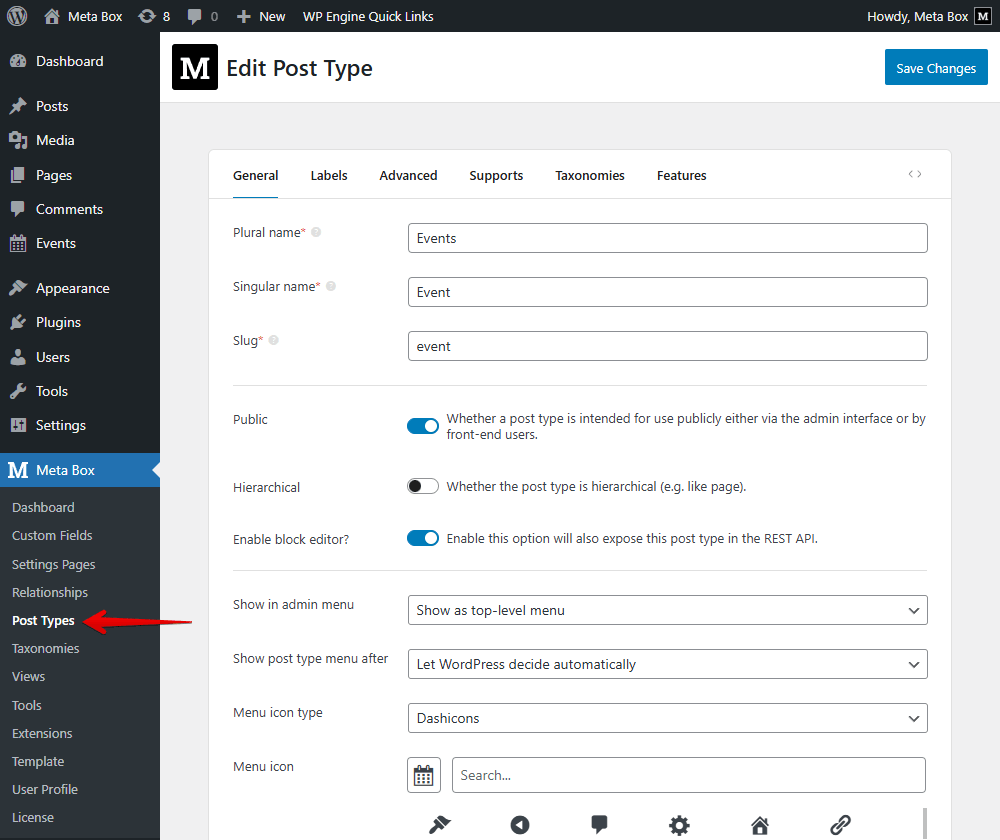
Create a Custom Post Type and Custom Taxonomy for the Events
Go to Meta Box > Post Types to create a new one.
Now, navigate to the Taxonomies sub-menu to create a custom taxonomy. I note the term to distinguish and compare the results more easily later. Don’t forget to assign it to the event post type.

In the Advanced tab, I enable the Show admin column option, so the term will be shown in a column in the admin dashboard.

After publishing, go to it to create some terms. And these are the terms we have.
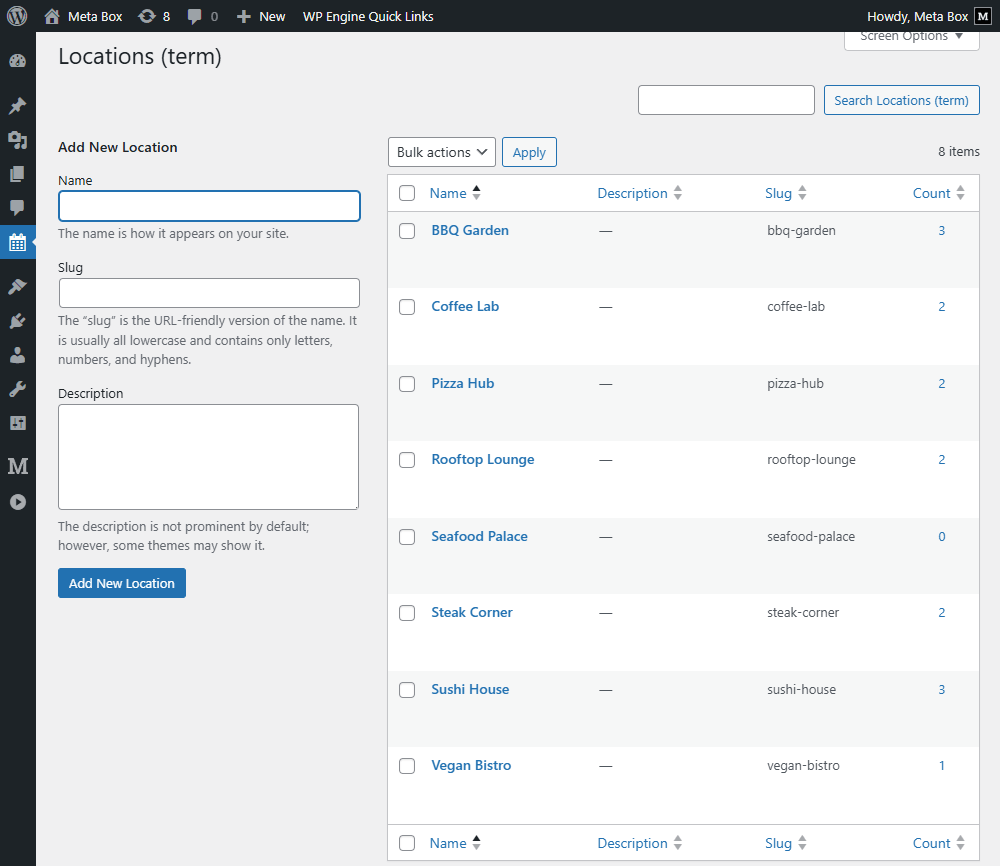
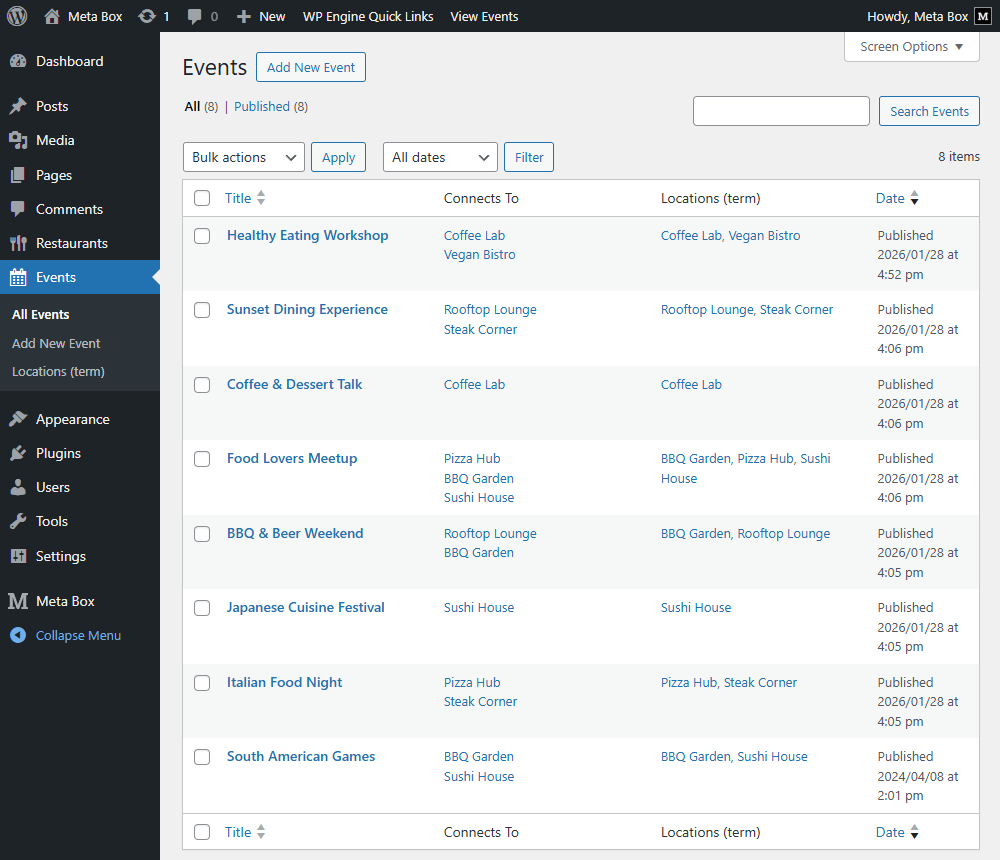
In each event, you can add terms for it. After that, the terms are displayed in a column.

In the next step, we’ll sync them to posts.
Sync Terms to Posts
First of all, I create another post type that will contain all the synced posts. I named it Restaurant. There is no post in it now.

Instead of creating posts manually as normal, I will sync the created terms using code.
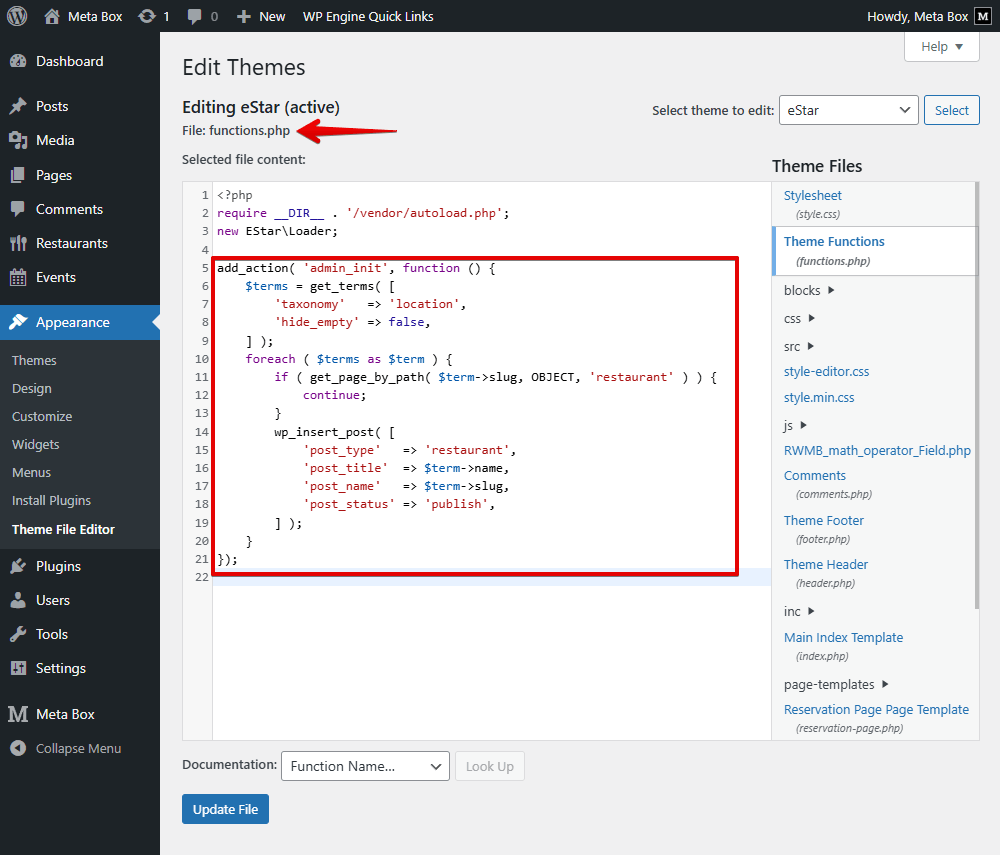
Go to your theme file editor and navigate to the functions.php file to add some code.
add_action( 'admin_init', function () {
    $terms = get_terms( [
        'taxonomy' => 'location',
        'hide_empty' => false,
    ] );
    foreach ( $terms as $term ) {
        if ( get_page_by_path( $term->slug, OBJECT, 'restaurant' ) ) {
            continue;
        }
        wp_insert_post( [
            'post_type' => 'restaurant',
            'post_title' => $term->name,
            'post_name' => $term->slug,
            'post_status' => 'publish',
        ] );
    }
});
In there:
$terms = get_terms( [
    'taxonomy' => 'location',
    'hide_empty' => false,
] )
This part is to get all the terms of the taxonomy that have the location slug, including the terms that haven’t been added to any post.
foreach ( $terms as $term ) { is to loop through each of them. Then, inside that loop, skip the slug that is the same as the term slug to avoid duplicates.
Then, to create a new restaurant, I use the last part. The new post will be added to the restaurant post type. The term’s name and slug become the post title and post slug, respectively.
After saving, all the terms are synced to the post of the restaurant post type.

Now, let’s move to the next step.
Transform Post–Term Relationships into Post–Post Relationships
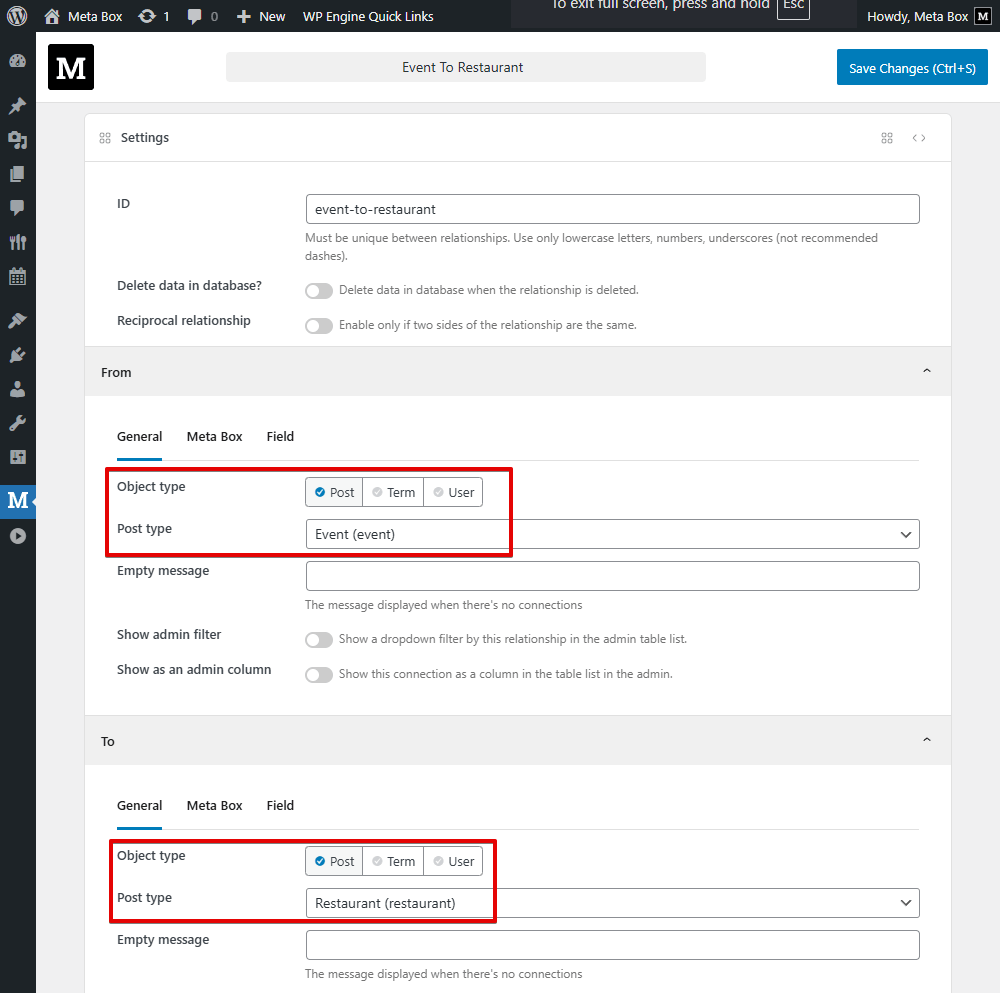
We need to create the relationship for the event and restaurant post type first. Go to Meta Box > Relationships, and create a new one. Meta Box provides two sections for setting up the relationship, just do it as normal.
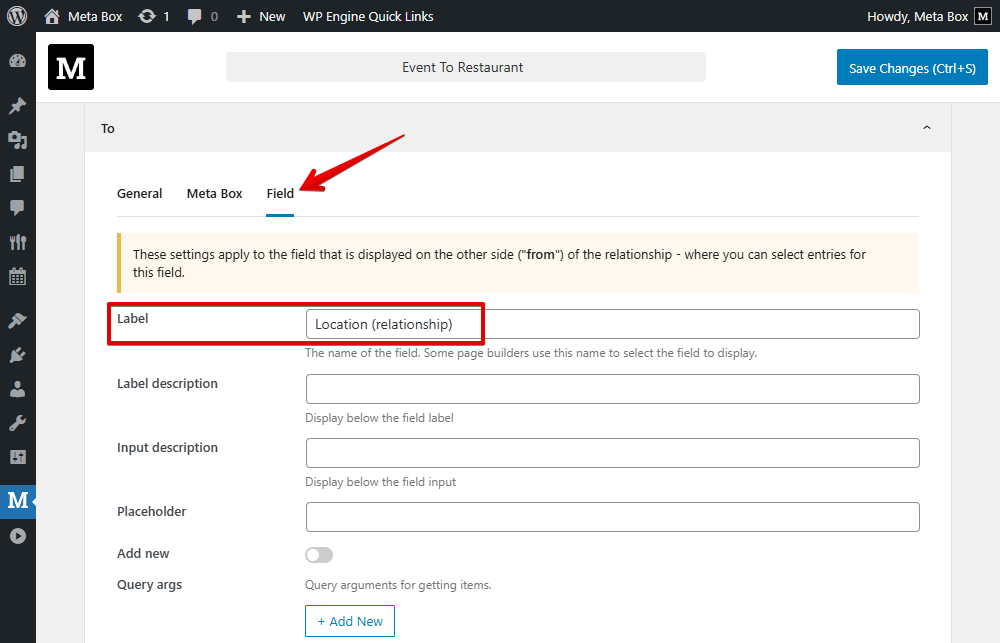
In the To section, I navigate to the Field tab to set the label of the relationship section in the post editor.
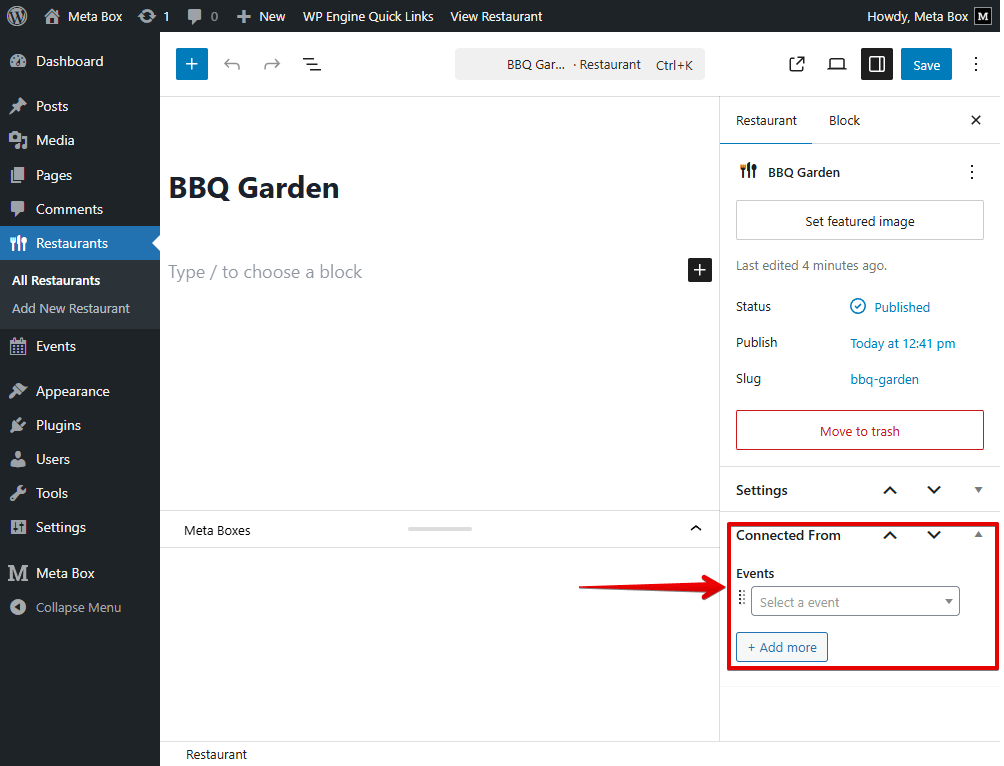
As a result, in each event, you can see a section to set a relationship for posts. But it’s blanks now.
Similar to the restaurant posts, I will not add them manually; I transform them from the term automatically, using code as well.
Back to the functions.php file, and add some code.
add_action( 'admin_init', function () {
    $events = get_posts([
        'post_type' => 'event',
        'posts_per_page' => -1,
        'fields' => 'ids',
    ]);
    foreach ( $events as $event_id ) {
        $terms = wp_get_post_terms( $event_id, 'location' );
        foreach ( $terms as $term ) {
            $restaurant = get_page_by_path(
                $term->slug,
                OBJECT,
                'restaurant'
            );
            if ( $restaurant ) {
                MB_Relationships_API::add(
                    $event_id,
                    $restaurant->ID,
                    'event-to-restaurant'
                );
            }
        }
    }
});

Specifically:
$events = get_posts([
    'post_type' => 'event',
    'posts_per_page' => -1,
    'fields' => 'ids',
])
This part is to retrieve all posts from the event post type, then return only post IDs.
Also loop through all the events, and $terms = wp_get_post_terms( $event_id, 'location' ) is to fetch all location terms linked to the current event.
Continuing loop through terms to find the corresponding restaurant post.
Then, I add a part to transform the relationship.
if ( $restaurant ) {
    MB_Relationships_API::add(
        $event_id,
        $restaurant->ID,
        'event-to-restaurant'
    );
}
In the case that a matching restaurant is found, a relationship is created. event-to-restaurant is the ID of the relationship we created before.
That’s all.
Now, check the relationship in each post. In the admin dashboard, you can see that the data in two columns is the same.
Last Words
We hope that this guide can help you manage data easily and flexibly. After converting data to posts and relationship, you can filter or display related posts based on it. Thanks for reading!
 Rename Taxonomy Without Losing Assigned Posts with Meta Box
  Using the Same Taxonomy for Multiple Post Types in WordPress: Pros and Cons
  How to Filter Posts by Custom Fields and Custom Taxonomies on Archive Pages