
Moving data between different WordPress meta types can be tricky, especially when you need to convert user meta to post meta without losing existing data. Whether you're restructuring your site's data model or changing how custom fields are associated with content, manually migrating hundreds or thousands of values can be time-consuming and error-prone.
In this guide, we'll show you how to convert user meta to post meta while keeping your existing values intact, so you can restructure your WordPress data with confidence.

For demonstration, I put this guide in the real case: managing data for doctors. Our aim is to convert two objects:
- Uers to the posts of the doctor post type
- User meta to post meta.
Video Version

Why and when is this necessary?
In some cases, converting users and user meta to posts is an optimal choice. For example, when you want to display users on an archive page or a single page, such as a Team member or a profile. With these pages, you can customize the layout with a theme or page builders.
More importantly, with the posts, you can also query data easily. Then, filtering, sorting, or pagination becomes simpler than users.
In addition, if you want to categorize content with taxonomies, posts are the better choice.
Before Getting Started
We highly recommend you use Meta Box AIO to have both the framework and all the advanced features from Meta Box extensions. These are the extensions we use:
- MB Admin Column: to display the field value in a column on the admin dashboard.
- MB Custom Post Type: to create a custom post type that contains the converted posts.
- MB User Meta: to create custom fields for users.
- MB Builder: to have UI in the backend to create custom fields visually.
Now, let’s start.
Create Custom Fields for Users
We have had a tutorial on how to do it. Go to Meta Box > Custom Fields and create a new field group. I’ve already had it, with some basic fields. You can change them as you need.

In the Settings panel, I applied this field group to the User. Then, you can see them in the user profile. I input data for them as well.

Now, let’s move to the next step.
Convert Users to Posts
As I said before, we’ll convert all the users to doctors that are posts of the doctor post type. So you need to have that custom post type first. There is no post in it now.
Instead of creating them one by one as usual, I’ll use code to convert users to it automatically.
Go to your theme file editor and navigate to the functions.php file to add code.
add_action( 'init', function() {
    if ( ! is_admin() ) return;
    if ( get_option( 'mb_step1_users_to_doctors_done' ) ) return;
    $users = get_users();
    foreach ( $users as $user ) {
        $existing = get_posts([
            'post_type'  => 'doctor',
            'meta_key'   => 'user_id',
            'meta_value' => $user->ID,
            'fields'     => 'ids'
        ]);
        if ( ! empty( $existing ) ) continue;
        $post_id = wp_insert_post([
            'post_type'   => 'doctor',
            'post_status' => 'publish',
            'post_title'  => $user->display_name,
        ]);
        if ( is_wp_error( $post_id ) ) continue;
        update_post_meta( $post_id, 'user_id', $user->ID );
    }
    update_option( 'mb_step1_users_to_doctors_done', 1 );
});
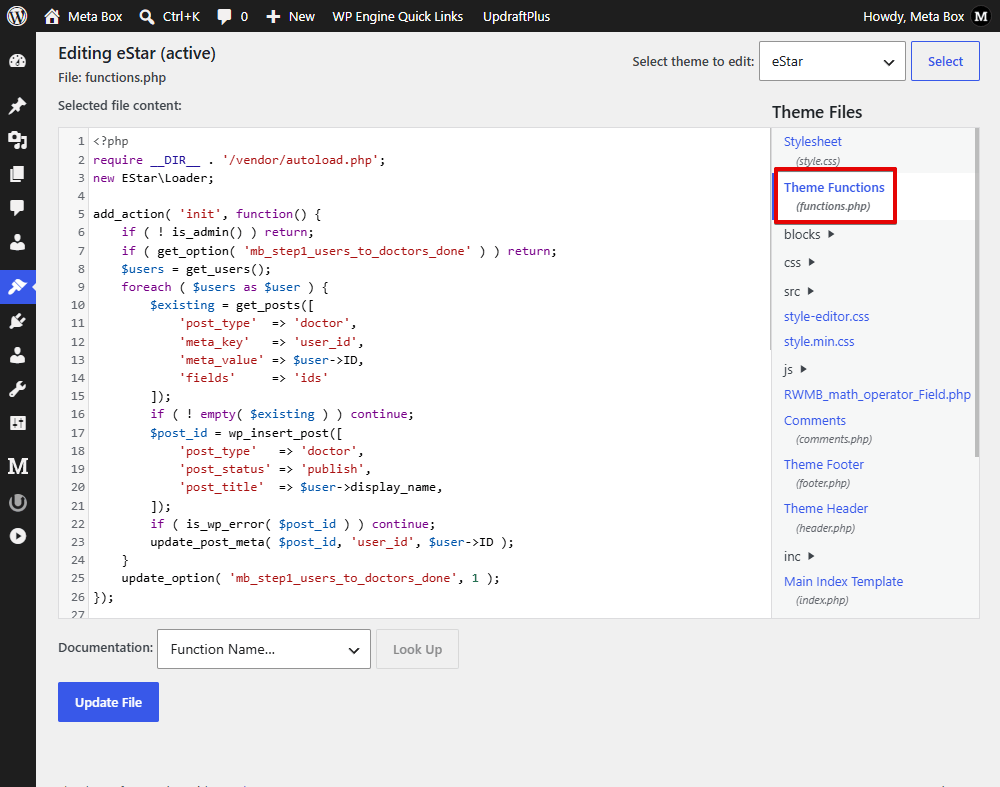
Let’s break down this code:
 if ( ! is_admin() ) return;
 if ( get_option( 'mb_step1_users_to_doctors_done' ) ) return;
This part is to regulate the conditions for running the code. The code only runs in the admin area to avoid running on the frontend. While if the post exists, the code has already run, so it will not run again. This ensures that each post will be converted only once.
Then, $users = get_users(); is to retrieve all users in the WordPress system.
Next, loop through each user for individual processing.
Inside the loop, I add a part to check whether a doctor post already exists for the current user, based on the user_id meta field. Specifically, I call a function to retrieve posts in the doctor post type. And its user ID meta matches the ID of the user. Here, I set only return post IDs for better performance.
If a corresponding post already exists, skip the code below to avoid duplicating the post. Otherwise, a new post will be created. The new post is added to the doctor post type, with the published status, and the post title is the user name.
If post creation fails, skip the user. Then, this means I store the user ID in post meta to link the user to the post. Finally, mark the user as completed so it won’t run again.
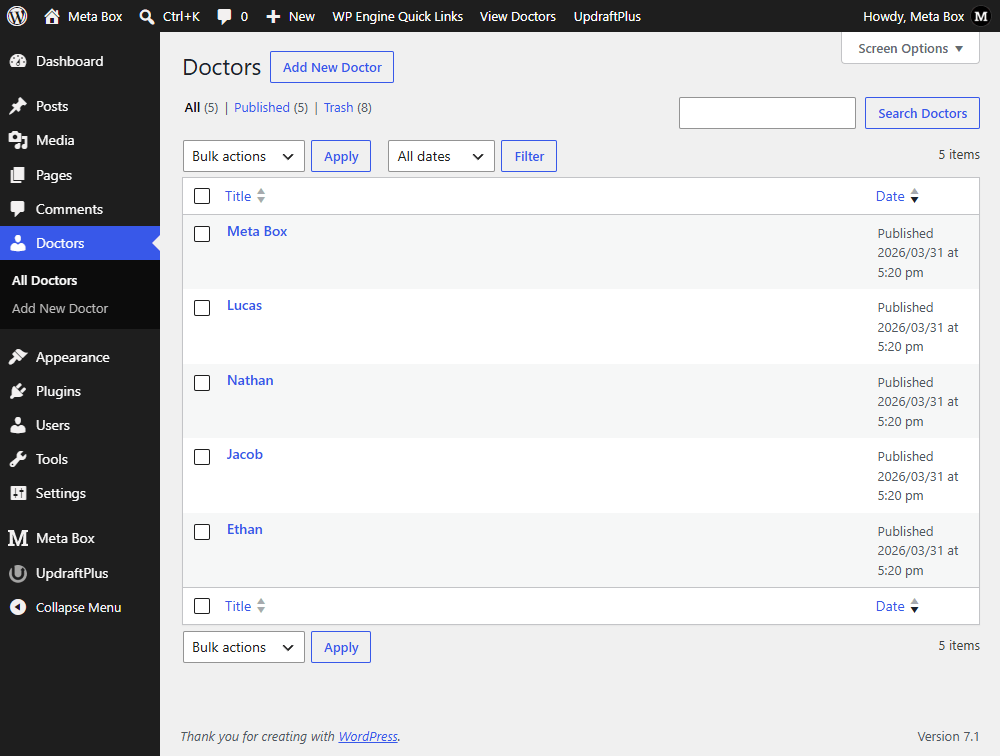
Now, go to the doctor post type, you can see we have these posts that correspond to the user.
Next, we will convert data from user meta to post meta.
Convert User Meta to Post Meta
Firstly, I add the field group to the doctor post type. Simply change the location of your created field group.

Then, we also use code to convert the input data automatically instead of entering it once again.
Back to the function.php file. And add some code.
add_action( 'init', function() {
    if ( ! is_admin() ) return;
    if ( ! get_option( 'mb_step1_users_to_doctors_done' ) ) return;
    if ( get_option( 'mb_step2_fields_converted' ) ) return;
    $doctors = get_posts([
        'post_type'      => 'doctor',
        'posts_per_page' => -1,
    ]);
    foreach ( $doctors as $doctor ) {
        $post_id = $doctor->ID;
        $user_id = get_post_meta( $post_id, 'user_id', true );
        if ( ! $user_id ) continue;
        $fields = [
            'age',
            'specialty',
            'position',
            'years_of_experience',
        ];
        foreach ( $fields as $field ) {
            $value = get_user_meta( $user_id, $field, true );
            if ( $value !== '' ) {
                update_post_meta( $post_id, $field, $value );
            }
        }
        $avatar_id = get_user_meta( $user_id, 'avatar', true );
        if ( $avatar_id ) {
            set_post_thumbnail( $post_id, $avatar_id );
        }
    }
    update_option( 'mb_step2_fields_converted', 1 );
});

In there:
if ( ! is_admin() ) return;
if ( ! get_option( 'mb_step1_users_to_doctors_done' ) ) return;
if ( get_option( 'mb_step2_fields_converted' ) ) return;
These are the conditions to run the code below as well, including only running in the admin screen, and only when the post conversion in the previous step is completed. Also, if the field has been converted yet, it will not run again.
Next, I get all the posts from the doctor post type, then loop through each one. I get the ID of the current post and the user ID that is retrieved in the first step. Skip the next code if there is no user ID exists. Otherwise, I regulate a field list we want to convert. Then, for each field, the value is obtained from the user meta to clone to the corresponding post. In addition, I set the post featured image as the avatar of the user. Finally, mark this step as completed as well.
That’s all.
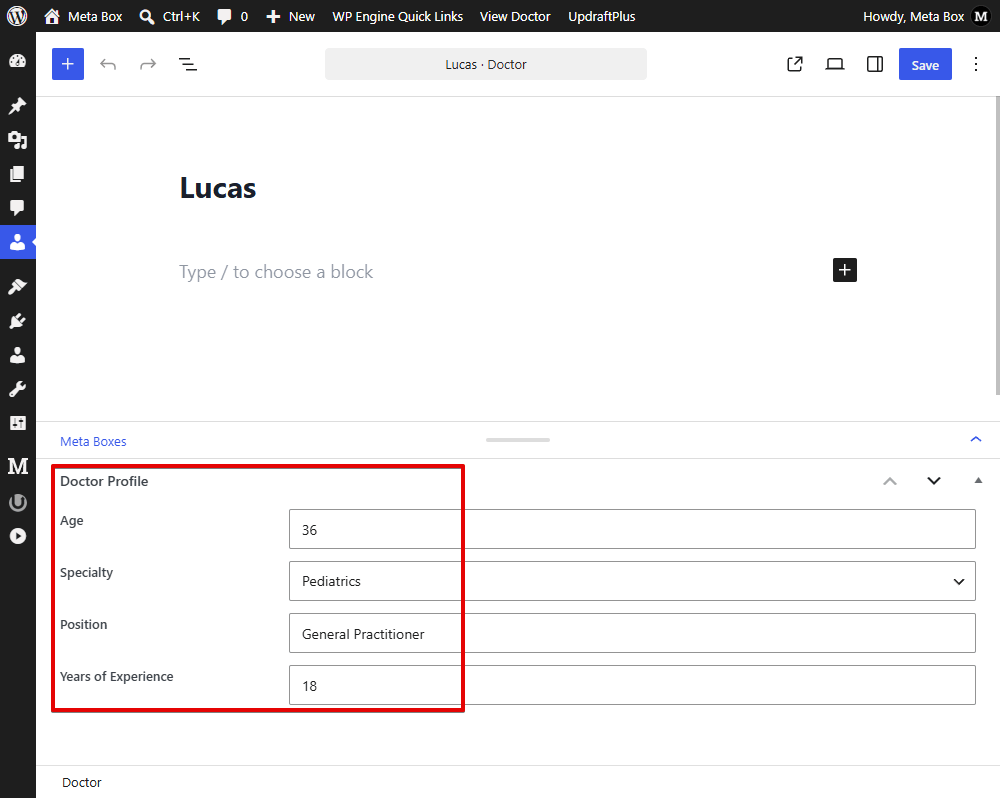
Now, when you go to a post editor, you can see that all the data has been migrated.
Last Words
We've shown you how to move user meta to post meta using Meta Box. This approach can save time, reduce the risk of data loss, and make it easier to manage your custom data after the migration.
You can also convert terms to posts in some neeđe cases. Refer to our blog posts for more helpful tutorials. Thanks for reading.

 How to Migrate Data When Switching from Cloneable Fields to Groups
  How to Change the ID of a Meta Box Field
  How to Convert Cloneable Fields to Store Values in Multiple Rows in the Database