
In a previous guide, we created a section for related posts that suggests some posts the user may be interested in based on the viewed post. And in this one, I want to show the way to add another advanced functionality for your blog page: Adding a section for users’ viewing history. It includes all the posts that the user viewed recently.
Each account gets a dynamic list, tailored to its own reading history. There is also a button to clear the history.
Video Version

Before Getting Started
As I mentioned at first, we’ll add the section of recently viewed posts using MB Views. So, you need to install Meta Box AIO to have a framework and advanced features from extensions in this plugin. Especially, I activate MB Views to create a template for displaying the viewing history. If you need to have other features, just enable the corresponding extension.
I’ve already had the posts, and displayed them on the frontend.
Now, let’s go.
Display the Recently Viewed Posts
The section has two functionalities: one is the area for displaying the list of recently viewed, and the other is a button that allows you to clear them all. So, we’ll use some JavaScript to add actions for our demands.
Go to Meta Box > MB Views, and create a new template to display recently viewed posts.
Declare JavaScript Libraries and Style the Page
In the Template tab, add some code:
<script src="https://code.jquery.com/jquery-3.7.1.min.js"></script>
<script src="https://cdn.jsdelivr.net/npm/[email protected]/dist/js.cookie.min.js"></script>
<script src="https://cdn.jsdelivr.net/npm/swiper@11/swiper-bundle.min.js"></script>
<link rel="stylesheet" href="https://cdn.jsdelivr.net/npm/swiper@11/swiper-bundle.min.css" />

<div id="mb-recently-viewed" class="mb-recently-viewed">
    <h2 class="mb-rv-title">Recently Viewed Posts</h2>
    <p class="mb-rv-loading">Loading...</p>
    <div class="mb-rv-list"></div>
</div>

In there:
The first four lines are to declare that we’ll use JavaScript libraries for showing the recently viewed posts and adding the Clear button.
You should set the div tags and classes for objects to style them more easily later:
I set the title of the section as “Recently Viewed Posts”. You can change it as you want. I also set the displayed content when the page loads, you can skip it.
mb-rv-list: is the class that contains the recently viewed posts. The specific posts are then processed by JavaScript later.
It’s that simple.
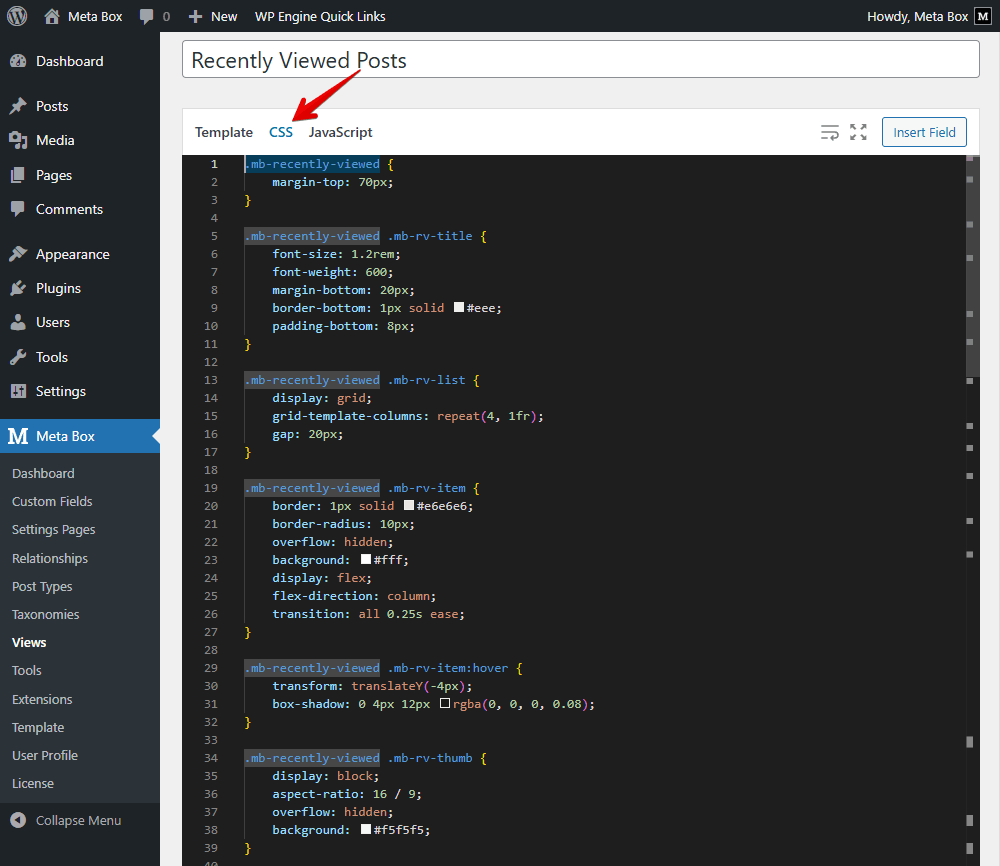
Next, move to the CSS tab to style the section. Just feel free to add code, as to how you want the viewed post section to look.
Adding JavaScript to Regulate the Action of the Viewed Posts Section
This is the key part of this guide.
Navigate to the JavaScript tab and add some code. The code in this section is closely coupled with the elements previously defined in the Template tab.
jQuery(function ($) {
    window.addEventListener('load', async () => {
        const $section = $('#mb-recently-viewed');
        if (!$section.length || !$('body').hasClass('single-post')) return;

        const $container = $section.find('.mb-rv-list');
        const $loading = $section.find('.mb-rv-loading');

        // Create a fixed uid for this browser (not dependent on login)
        const uid = (function () {
            const saved = localStorage.getItem('mb_rv_uid');
            if (saved) return saved;
            const v = 'guest-' + Math.random().toString(36).slice(2);
            localStorage.setItem('mb_rv_uid', v);
            return v;
        })();
        const key = `mb_recently_viewed_posts_${uid}`;

        const getList = () => {
            try { return JSON.parse(Cookies.get(key) || '[]'); }
            catch { return []; }
        };
        const setList = (list) => Cookies.set(key, JSON.stringify(list), { expires: 7 });

        // Record the current post
        const currentId =
            $('article[id^="post-"]').attr('id')?.replace('post-', '') ||
            $('body').attr('class')?.match(/postid-(\d+)/)?.[1] || null;

        if (currentId) {
            const updated = [
                { id: currentId, time: Date.now() },
                ...getList().filter(item => item.id !== currentId),
            ].slice(0, 10);
            setList(updated);
        }

        // Filter items older than 7 days
        const now = Date.now();
        let list = getList().filter(({ time }) => now - time < 7 * 24 * 60 * 60 * 1000);
        setList(list);

        if (!list.length) {
            $loading.text('No recently viewed posts.');
            return;
        }

        const ids = list.map(item => item.id);

        try {
            const res = await fetch(`/wp-json/wp/v2/posts?include=${ids.join(',')}&_embed&per_page=100`);
            const posts = await res.json();
            $loading.remove();

            const postMap = Object.fromEntries(posts.map(p => [String(p.id), p]));
            renderClearButton($section, key, $container);

            const items = ids.map(id => createItem(postMap[id])).filter(Boolean);
            ids.length <= 4
                ? renderGrid($container, items)
                : renderSwiper($section, $container, items);
            } catch (e) {
                console.error(e);
                $loading.text('Unable to load recently viewed posts.');
            }
        });

        function renderClearButton($section, key, $container) {
            if ($section.find('#mb-clear-history').length) return;
            $('<button>', {
                id: 'mb-clear-history',
                class: 'mb-clear-history',
                text: 'Clear History',
                css: { float: 'right', marginBottom: 10 },
                click: () => {
                    Cookies.remove(key);
                    if (window._recentlySwiper?.destroy) {
                        window._recentlySwiper.destroy(true, true);
                        window._recentlySwiper = null;
                    }
                    $container.empty().append('<p>History cleared.</p>');
                }
            }).prependTo($section);
            }

    function createItem(post) {
        if (!post) return null;
        const img = post._embedded?.['wp:featuredmedia']?.[0]?.source_url || '/wp-content/uploads/placeholder.png';
        const date = new Date(post.date).toLocaleDateString();
        return $(`
            <article class="mb-rv-item">
                <a class="mb-rv-thumb" href="${post.link}">
                    <img src="${img}" alt="${escapeHtml(post.title.rendered)}">
                </a>
                <div class="mb-rv-body">
                    <h4 class="mb-rv-title-item">
                        <a href="${post.link}">${post.title.rendered}</a>
                    </h4>
                    <p class="mb-rv-date">${date}</p>
                </div>
            </article>
        `);
    }

    function renderGrid($container, items) {
        $container.empty().append(items);
    }

    function renderSwiper($section, $container, items) {
         const $swiper = $('<div class="swiper mySwiper" aria-label="Recently viewed slider"></div>');
         const $wrap = $('<div class="swiper-wrapper"></div>').appendTo($swiper);

         items.forEach(($item) =>
             $('<div class="swiper-slide"></div>').append($item).appendTo($wrap)
         );

         $swiper.append('<div class="swiper-button-prev"></div><div class="swiper-button-next"></div><div class="swiper-pagination"></div>');
         $container.replaceWith($swiper);

         if (window._recentlySwiper?.destroy) window._recentlySwiper.destroy(true, true);
         window._recentlySwiper = new Swiper('.mySwiper', {
             slidesPerView: 4,
             spaceBetween: 20,
             navigation: { nextEl: '.swiper-button-next', prevEl: '.swiper-button-prev' },
             pagination: { el: '.swiper-pagination', clickable: true },
             breakpoints: {
                 0: { slidesPerView: 1.2 },
                 640: { slidesPerView: 2 },
                 768: { slidesPerView: 3 },
                 1024: { slidesPerView: 4 },
             },
         });
    }

        function escapeHtml(str = '') {
             return String(str)
                 .replace(/&/g, '&')
                 .replace(/</g, '<')
                 .replace(/>/g, '>')
                 .replace(/"/g, '"');
        }
});
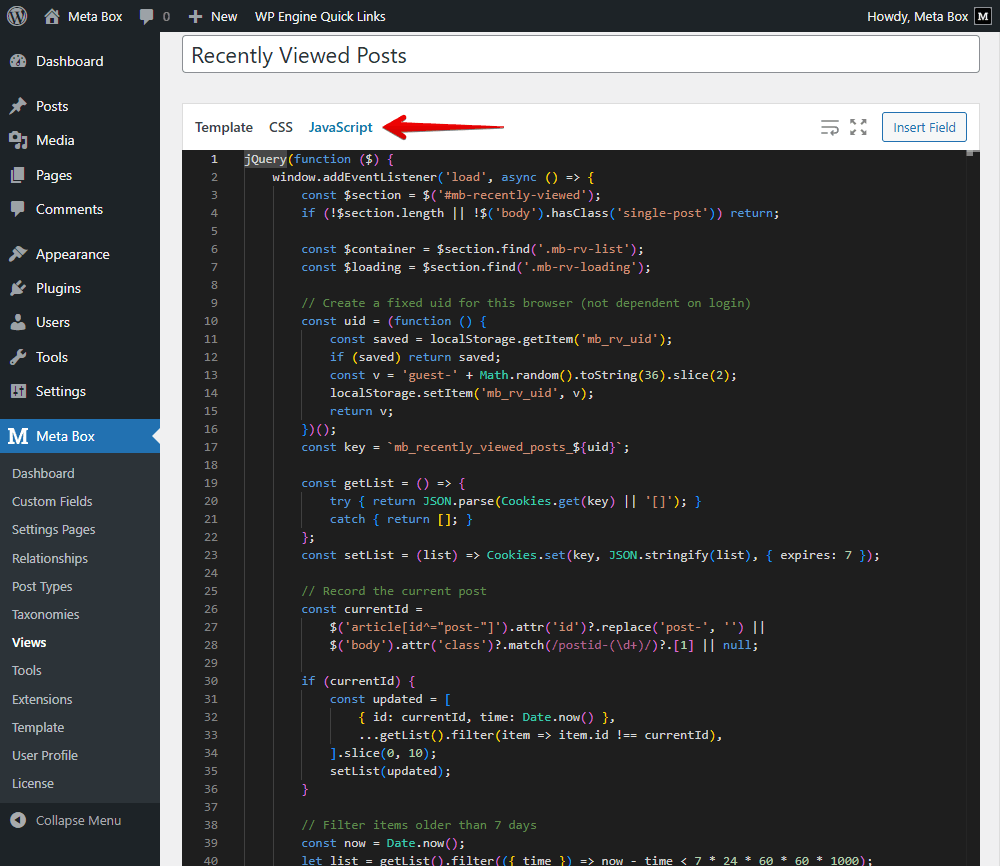
Let’s break down the code for more details.
Action for The Viewed Posts
const $section = $('#mb-recently-viewed');
if (!$section.length || !$('body').hasClass('single-post')) return;
This is to check the condition for the feature. Here I set the code below will run only when the #mb-recently-viewed block already exists, and, the user is in a single post.
const $container = $section.find('.mb-rv-list');
const $loading = $section.find('.mb-rv-loading')
These lines are to cache the needed elements. It is to find, save, and reuse the .mb-rv-list and .mb-rv-loading elements.
const uid = (function () {
    const saved = localStorage.getItem('mb_rv_uid');
    if (saved) return saved;
    const v = 'guest-' + Math.random().toString(36).slice(2);
    localStorage.setItem('mb_rv_uid', v);
    return v;
})();
const key = `mb_recently_viewed_posts_${uid}`;
This is to create a fixed UID for the browser. It’s to create a unique cookie key for each browser. It can also be used for the guest user, regardless of the user's login.
const getList = () => {
    try { return JSON.parse(Cookies.get(key) || '[]'); }
    catch { return []; }
};
const setList = (list) => Cookies.set(key, JSON.stringify(list), { expires: 7 });
This code is to initialize two functions that will work with cookies. They are used to get and save posts in the list. Additionally, I set the expiration time through expires: 7 so you can change the number according to your opinion.
const currentId =
    $('article[id^="post-"]').attr('id')?.replace('post-', '') ||
    $('body').attr('class')?.match(/postid-(\d+)/)?.[1] || null;

if (currentId) {
    const updated = [
        { id: currentId, time: Date.now() },
        ...getList().filter(item => item.id !== currentId),
    ].slice(0, 10);
    setList(updated);
}
This is to record the current post in history. In there, I get the post ID via one of two ways. Then, it will be added as the top position of the list. You can also set the maximum number of the latest posts.
To keep the cookie clear, I use these lines of code:
const now = Date.now();
let list = getList().filter(({ time }) => now - time < 7 * 24 * 60 * 60 * 1000);
setList(list);

if (!list.length) {
    $loading.text('No recently viewed posts.');
    return;
}

const ids = list.map(item => item.id);
It means only keep posts that were viewed within the last 7 days. The last line of this part is to query the list of post IDs.
Noticed that all the numbers I use in this video are for demonstration. So you can change them as your needs.
try {
    const res = await fetch(`/wp-json/wp/v2/posts?include=${ids.join(',')}&_embed&per_page=100`);
    const posts = await res.json();
    $loading.remove();

    const postMap = Object.fromEntries(posts.map(p => [String(p.id), p]));
    renderClearButton($section, key, $container);

    const items = ids.map(id => createItem(postMap[id])).filter(Boolean);
    ids.length <= 4
        ? renderGrid($container, items)
        : renderSwiper($section, $container, items);
} catch (e) {
    console.error(e);
    $loading.text('Unable to load recently viewed posts.');
}
I add this code to render the result. Especially, const items = ids.map(id => createItem(postMap[id])).filter(Boolean); is to map the post IDs along with the order we set. Then, based on the number of rendered posts, there will be two layouts for them. If there are 4 posts or fewer, they will be shown in a grid. Otherwise, I use Swiper to optimize UI.
function renderClearButton($section, key, $container) {
    if ($section.find('#mb-clear-history').length) return;
    $('<button>', {
        id: 'mb-clear-history',
        class: 'mb-clear-history',
        text: 'Clear History',
        css: { float: 'right', marginBottom: 10 },
        click: () => {
            Cookies.remove(key);
            if (window._recentlySwiper?.destroy) {
                window._recentlySwiper.destroy(true, true);
                window._recentlySwiper = null;
        }
        $container.empty().append('<p>History cleared.</p>');
    }
}).prependTo($section);
First, we create and render the button. When the user clicks on it, the cookie will be deleted, and destroy Swiper if it exists. After that, a notification that has defined content will be shown.
Now, back to the viewed posts, you need to regulate its data that is displayed. So, I add this part:
function createItem(post) {
    if (!post) return null;
    const img = post._embedded?.['wp:featuredmedia']?.[0]?.source_url || '/wp-content/uploads/placeholder.png';
    const date = new Date(post.date).toLocaleDateString();
    return $(`
        <article class="mb-rv-item">
            <a class="mb-rv-thumb" href="${post.link}">
                <img src="${img}" alt="${escapeHtml(post.title.rendered)}">
            </a>
            <div class="mb-rv-body">
                <h4 class="mb-rv-title-item">
                    <a href="${post.link}">${post.title.rendered}</a>
                </h4>
                <p class="mb-rv-date">${date}</p>
            </div>
        </article>
    `);
}
With it, I want to show the thumbnail, title, and date of the post.
function renderGrid($container, items) {
    $container.empty().append(items);
This is to render the grid.
function renderSwiper($section, $container, items) {
    const $swiper = $('<div class="swiper mySwiper" aria-label="Recently viewed slider"></div>');
    const $wrap = $('<div class="swiper-wrapper"></div>').appendTo($swiper);

    items.forEach(($item) =>
        $('<div class="swiper-slide"></div>').append($item).appendTo($wrap)
    );

    $swiper.append('<div class="swiper-button-prev"></div><div class="swiper-button-next"></div><div class="swiper-pagination"></div>');
    $container.replaceWith($swiper);

    if (window._recentlySwiper?.destroy) window._recentlySwiper.destroy(true, true);
    window._recentlySwiper = new Swiper('.mySwiper', {
        slidesPerView: 4,
        spaceBetween: 20,
        navigation: { nextEl: '.swiper-button-next', prevEl: '.swiper-button-prev' },
        pagination: { el: '.swiper-pagination', clickable: true },
        breakpoints: {
            0: { slidesPerView: 1.2 },
            640: { slidesPerView: 2 },
            768: { slidesPerView: 3 },
            1024: { slidesPerView: 4 },
        },
    });
}
This part is for the swiper, don’t forget the buttons for previous and next posts for a better user experience.
Last but not least, I add the last part of the code to escape the special HTML characters. It ensures that the text will be displayed safely and successfully in HTML. It plays an important role in the code frontend.
That’s all for the code. I uploaded the code to GitHub so you can refer to it.
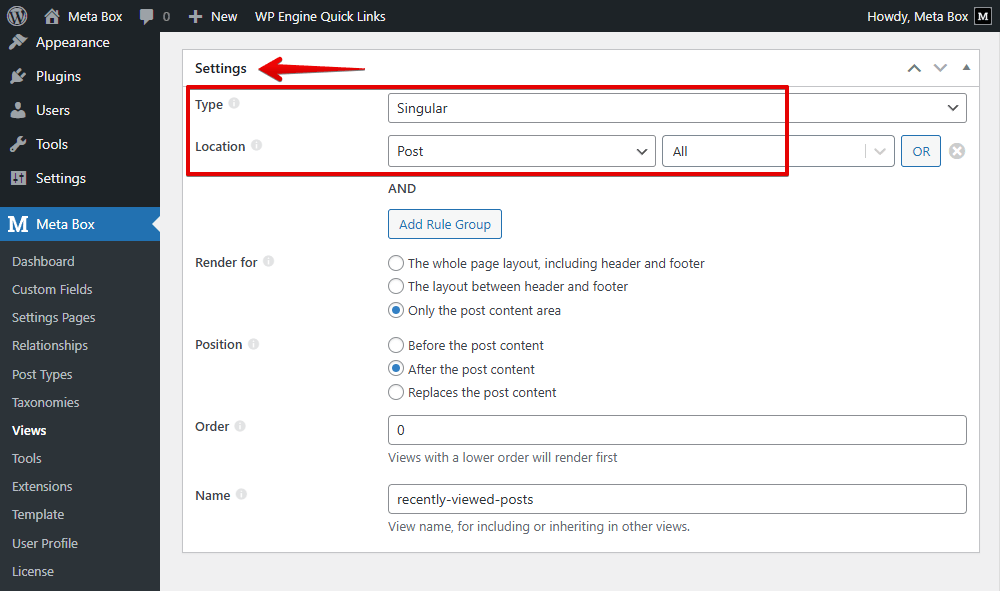
Finally, scroll down to the Settings section and set the type of the template as Singular. And choose the post to apply it to the single posts.
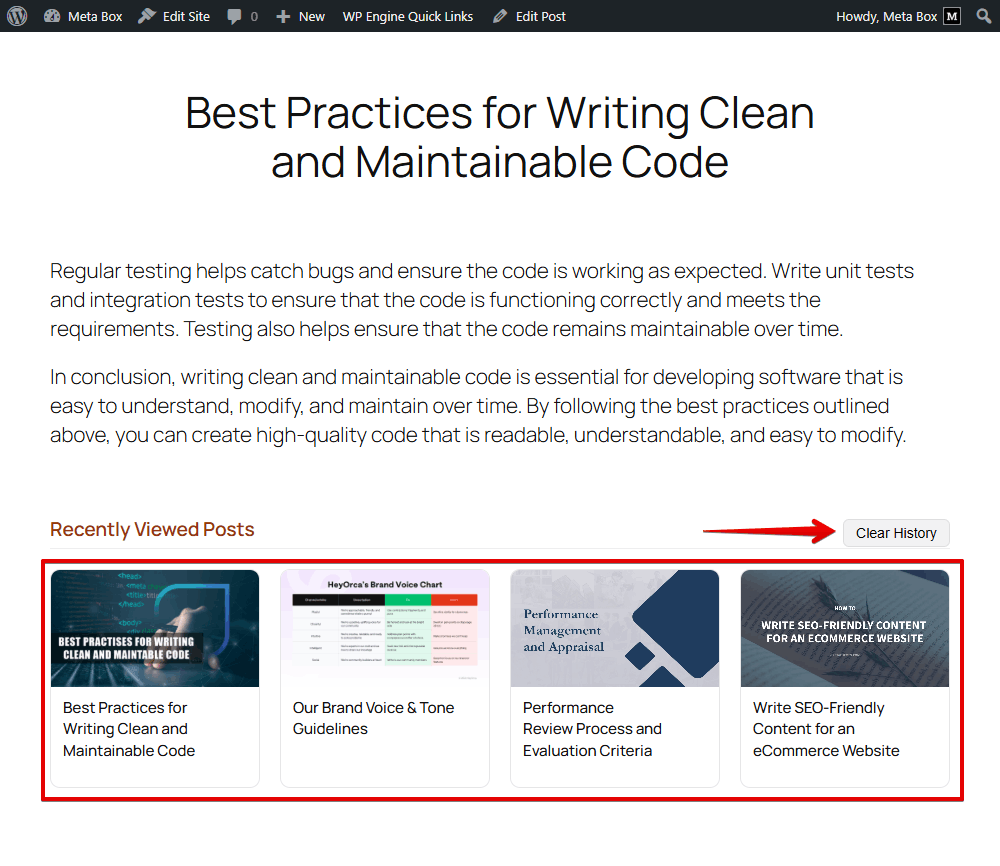
Now, on the frontend, you can see the section and the Clear button work well.
For the post, all the data we set is displayed as we want. They are in a grid. When you have more than 4 recently viewed posts, there is the swiper. The previous and next buttons also work well.
Last Words
Showing recently viewed posts is a small yet powerful feature that significantly elevates a website. It helps readers easily pick up where they left off with just one click, no need to remember post titles or search again. This creates a more intuitive and user-friendly experience, which then improves user retention by encouraging users to stay longer on the site. Try it with MB Views and share your thoughts with us.
To explore the power of MB Views, you can take a look at this series. Thanks for your reading.
- Advanced Map Listings
- Author Bio
- Better 404 Page
- Blogs for Developers
- Building a Simple Listing Website with Filters
- Building an Event Website
- Building Forms with MB Frontend Submission
- Coding
- Create a Chronological Timeline
- Custom Fields Fundamentals
- Design Patterns
- Displaying Posts with Filters
- Download and Preview Buttons
- Dynamic Banners
- Dynamic Landing Page
- FAQs Page
- Featured Products
- Filter Posts by Relationships
- Filter Posts by Taxonomy
- Full Site Editing
- Google Fonts
- Gutenberg
- Hotel Booking
- Latest Products
- Logo Carousel
- MB Builder Applications
- MB Group Applications
- MB Views Applications
- Most Viewed Posts
- Opening Hours
- OTA Website
- Pricing Table Page
- Product Page
- Product Variations
- Querying and Showing Posts by Custom Fields
- Recipe
- Related Posts via Relationship
- Restaurant Menus
- SEO Analysis
- Simple LMS
- Speed Up Website
- Taxonomy Thumbnails
- Team Members
- User Profile
- Video Gallery
 How to Display the Most Viewed Posts - P3 - Using Meta Box and Bricks
  How to Display the Most Viewed Posts - P2 - Using Meta Box and Oxygen
  How to Display the Most Viewed Posts - P1 - Using MB Views