
A well-organized timetable makes it much easier for visitors to find the right class, session, or teacher at a glance. But creating a timetable that is both dynamic and easy to manage in WordPress can be challenging.
In this tutorial, we’ll show you how to build a dynamic timetable in WordPress with Meta Box. You’ll learn how to display schedules in a clear, visual layout and let users filter sessions by teacher with just one click.
This approach works especially well for schools, training centers, language academies, fitness clubs, and yoga studios, or any website that needs to display schedules in a more flexible and user-friendly way.
 Let’s see what tools we need for this tutorial.
Video Version

Before Getting Started
In this tutorial, we’ll create a custom post type to manage all courses in the timetable. Each course will contain custom fields for schedule details such as start time, end time, weekday, and room. Meanwhile, teachers will be managed as a custom taxonomy so we can filter courses by teacher more easily.
So, I recommend using Meta Box AlO, which includes the framework and all extensions we need for this tutorial
- MB Admin Columns: display important course information such as start time, end time, schedule day, room, and assigned teacher directly in the admin dashboard. This makes course management much easier;
- MB Custom Post Type: create a custom post type for courses, as well as a custom taxonomy for teachers;
- MB Views: build the timetable template and display course data on the frontend;
- MB Builder: create custom fields for storing all course schedule information.
Step 1 Create a Custom Post Type, a Taxonomy, and Fields
For this tutorial, I’ve already prepared a custom post type for courses. Each course is saved as a post in this post type, making it easier to manage and display later in the timetable.
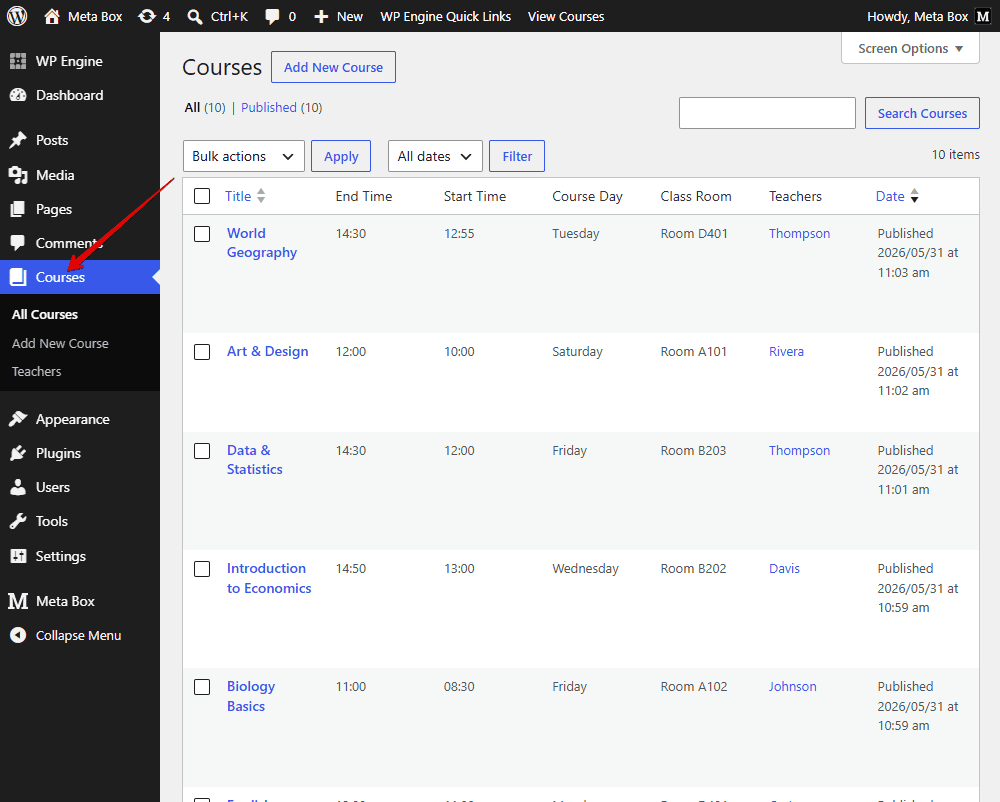
I’ve also created a taxonomy for related teachers, as you can see here.
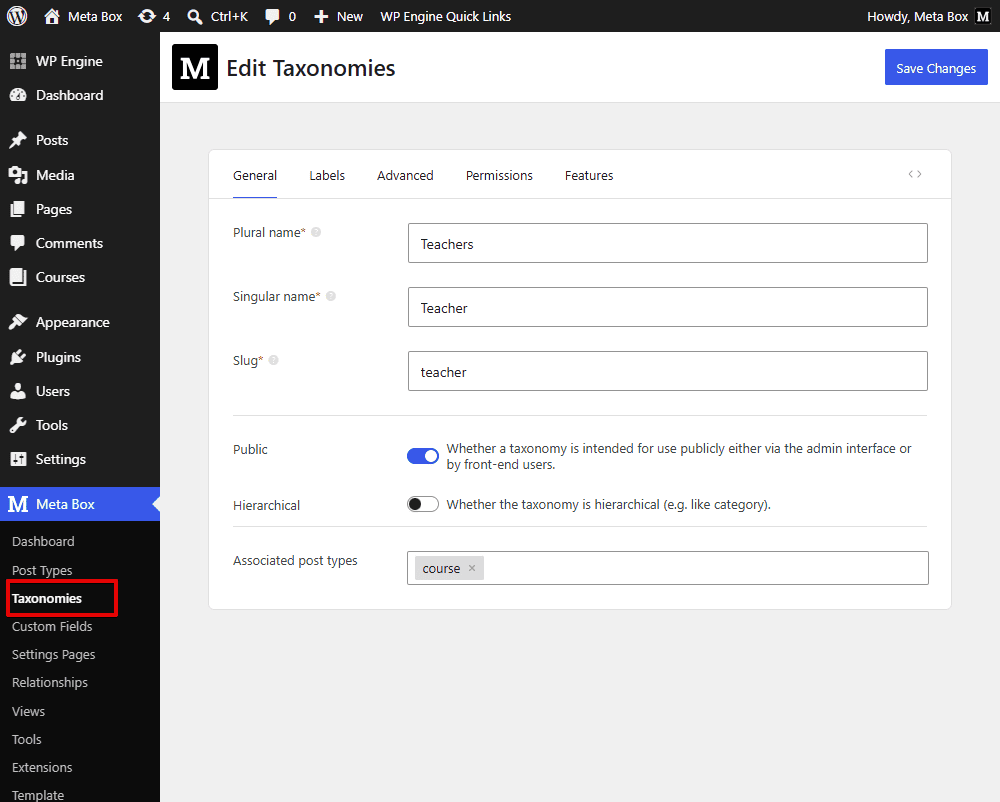
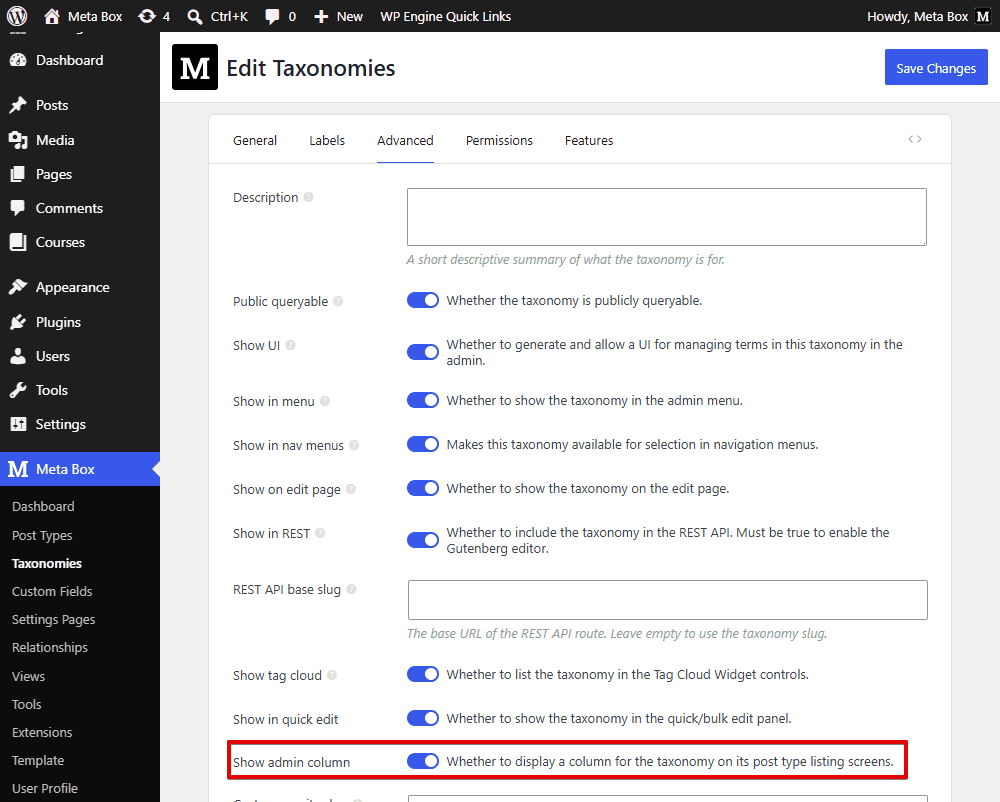
Make sure to choose the associated post type. And in the Advanced tab, enable the option to display the taxonomy in the admin columns. This option is available when the MB Admin Columns extension is activated, and it allows you to display a taxonomy column on the post type listing screen.
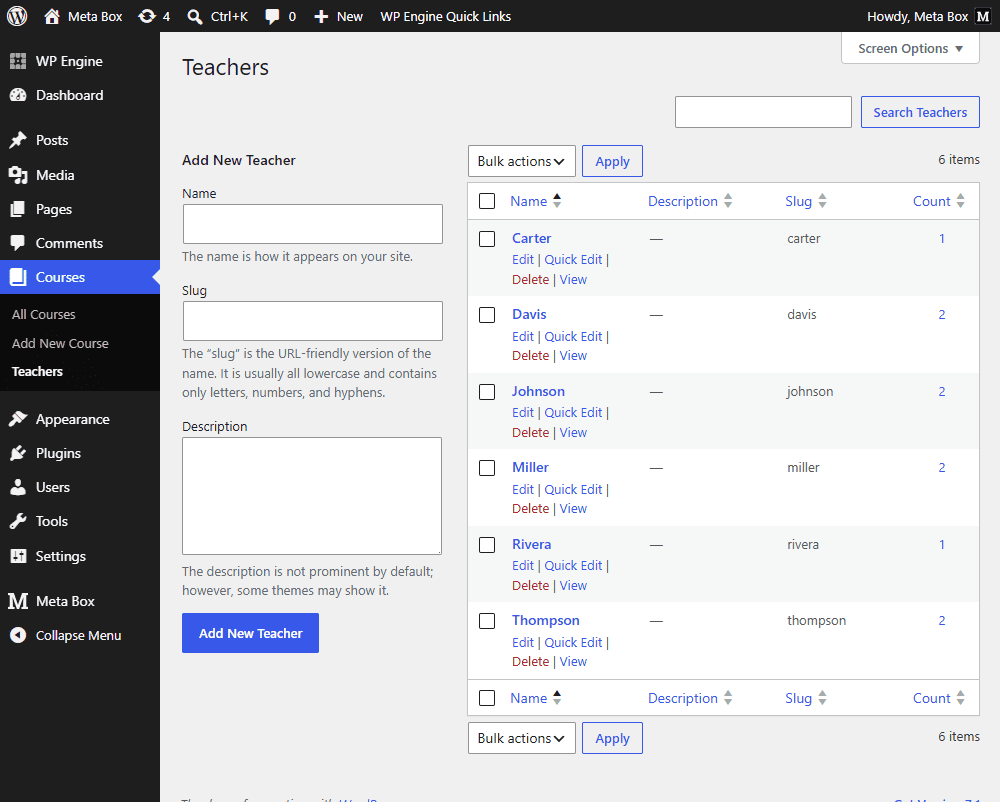
And then, create some terms for this taxonomy. In my case, these terms represent different teachers.
For convenience, I’ve created the field group in advance. It will include some fields like course color, classroom, course day, start time, and end time. For any field you want to manage more easily, you can enable this option to display it directly in the admin columns. Note that you can create any field you need for the courses.
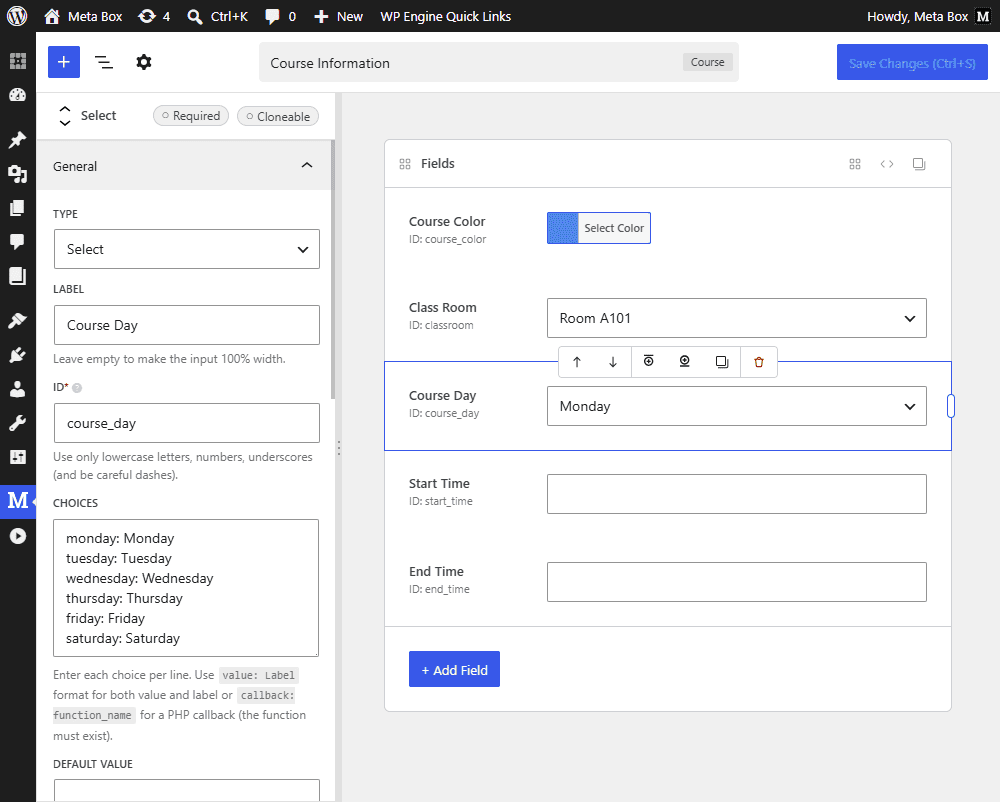
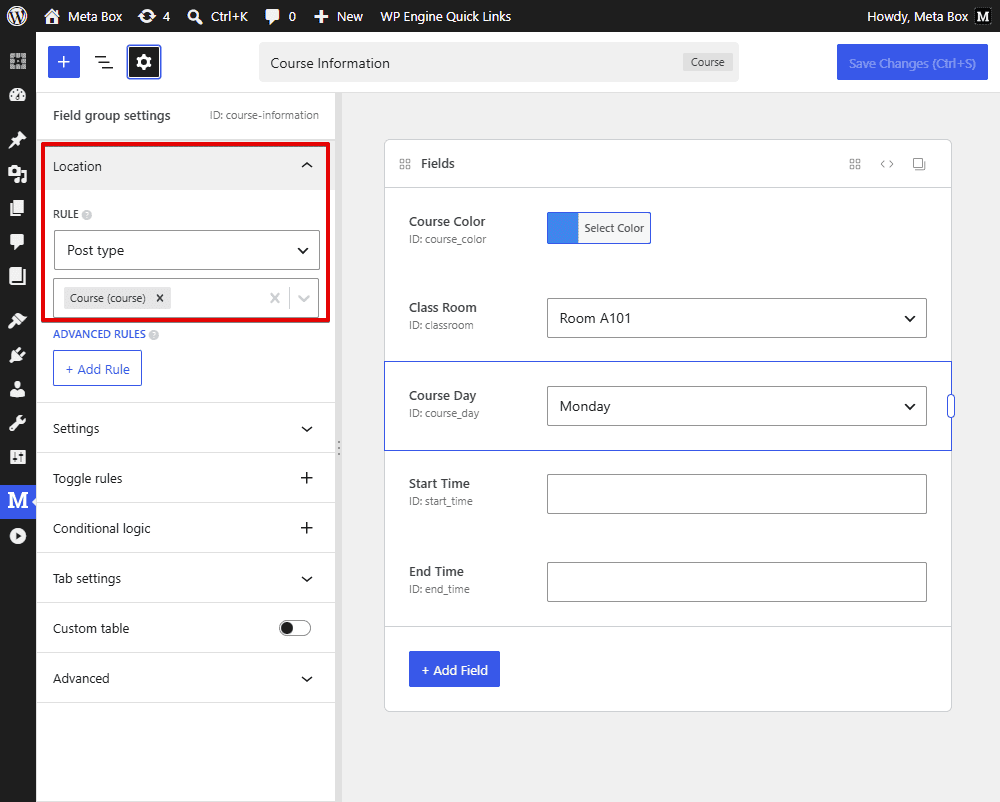
Once done, move to the Settings tab and set the Location as Post Type. Choose Course to ensure that the custom fields appear only for course posts.
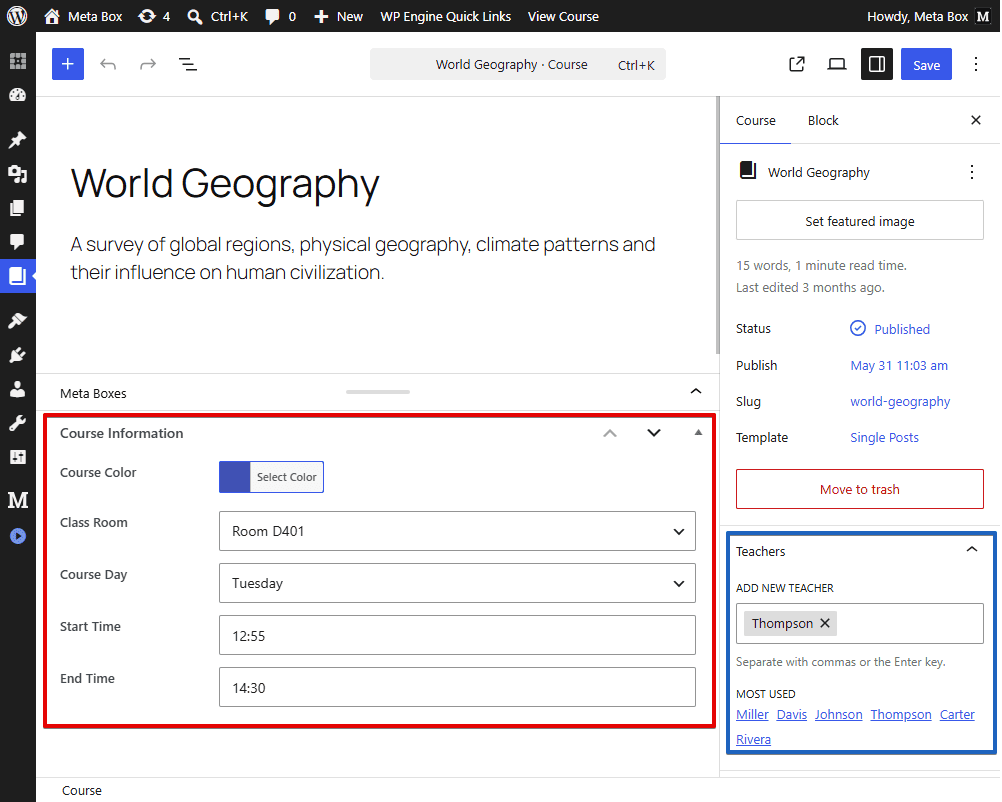
Now, in the post editor of the Set locationpost type, we’ll see all custom fields along with the taxonomy section, where we can assign the teacher.
Just fill in all the information.
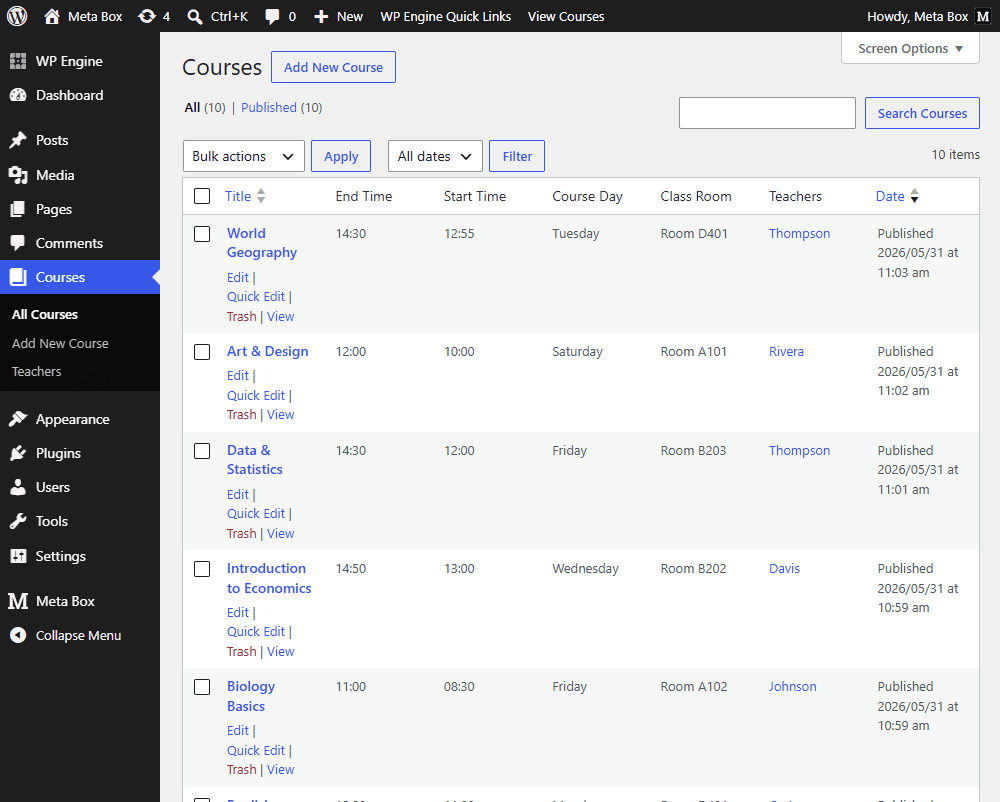
These are some sample courses that I created. All the needed information saved in custom fields appears on the admin dashboard. The teacher, as well as the taxonomy, is also displayed.
Step 2 Show Course Timetable
We first need to make sure that our courses are displayed correctly on the frontend. So, we create a new page specifically for the course listing. This page will act as the main timetable page for users to browse.
Now, go to Meta Box, Views, and create a new template specifically for this page. With MB Views, you can add some lines of code directly in the Template tab to query and retrieve all posts from the Course post type.
MB Views makes this step very convenient; you don’t need to write all the codes manually.
To display the course information from your custom fields, simply click the Insert Field button and select any fields from the right sidebar.
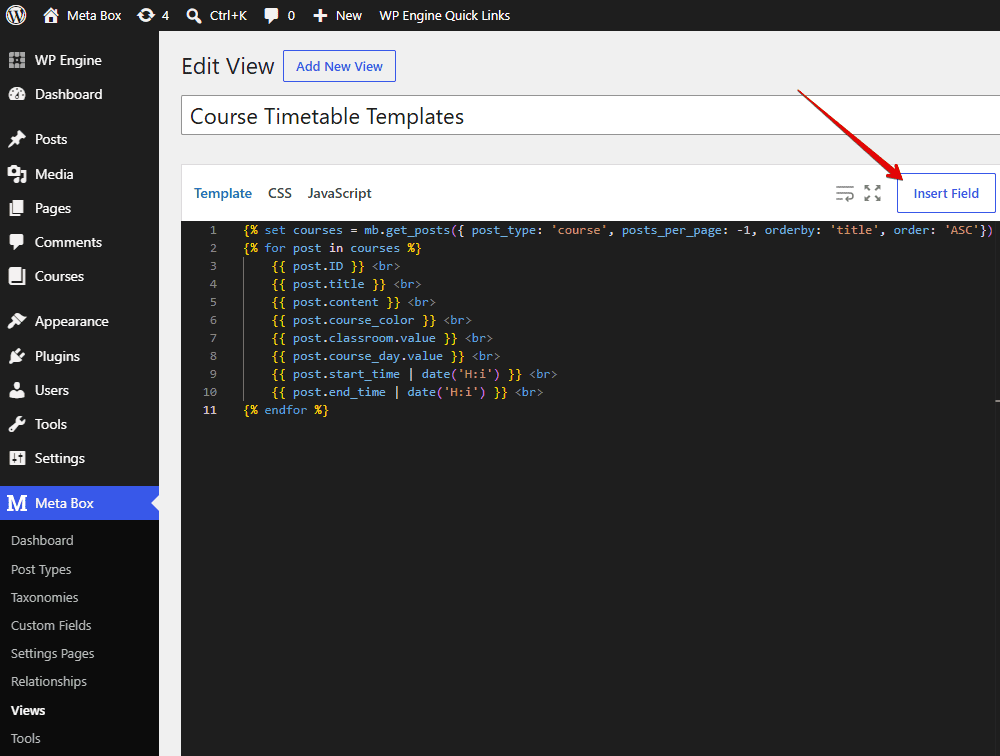
After inserting all the fields, move to the Settings section to set where this template will appear. Set the Type to Singular, and choose the page you created for the course listings.

On the frontend, you’ll see all the course information displayed. At this stage, it appears as a basic list without any styling.
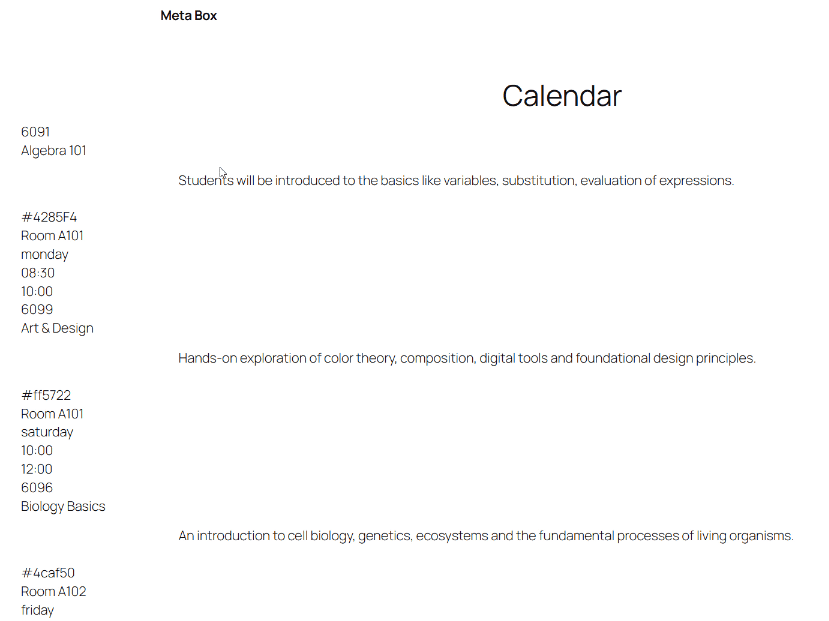
To transform it into a timetable layout, we need to add more code in the Template tab, along with some CSS and JavaScript.
<script src="https://cdnjs.cloudflare.com/ajax/libs/jquery/3.3.1/jquery.min.js"></script>
{% set courses = mb.get_posts({ post_type: 'course', posts_per_page: -1, orderby: 'title', order: 'ASC'}) %}
{% set course_data = [] %}
{% set teacher_map = {} %}
{% for post in courses %}
    {% set teacher_slugs = [] %}
    {% set teachers = mb.get_the_terms(post.ID, 'teacher') %}
    {% if teachers %}
        {% for t in teachers %}
            {% set teacher_slugs = teacher_slugs|merge([t.slug]) %}
            {% set teacher_map = teacher_map|merge({ (t.slug): t.name }) %}
        {% endfor %}
    {% endif %}
    {% set course_data = course_data|merge([{
        id: post.ID,
        title: post.post_title,
        description: post.content|striptags|slice(0, 120),
        day: post.course_day,
        start: post.start_time,
        end: post.end_time,
        color: post.course_color,
        room: post.classroom.value,
        teachers: teacher_slugs
    }]) %}
{% endfor %}
<div id="mb-course-schedule"
    data-courses='{{ course_data|json_encode() }}'
    data-teachers='{{ teacher_map|json_encode() }}'>
</div>
Explanation:
<script src="https://cdnjs.cloudflare.com/ajax/libs/jquery/3.3.1/jquery.min.js"></script>
First, this one is to load the jQuery library because the JavaScript code later will use it to render the timetable and handle the filtering interactions.
{% set course_data = [] %}
{% set teacher_map = {} %}
We initialize two empty arrays. The first array stores all processed course data. The second array stores teacher data, which will later be used for filtering.
Then, for each course, we retrieve all terms from the Teacher taxonomy assigned to that course.
{% set teacher_slugs = [] %}
{% set teachers = mb.get_the_terms(post.ID, 'teacher') %}
The following code adds all teacher slugs into an array and also creates a key-value map containing both teacher slug and teacher name. We’ll use this data later to generate the teacher filter buttons.
{% set teacher_slugs = teacher_slugs|merge([t.slug]) %}
{% set teacher_map = teacher_map|merge({ (t.slug): t.name }) %}
After that, each loop creates one course object and adds it into the main course array. Later, JavaScript will use this array to render the timetable.
{% set course_data = course_data|merge([{
    id: post.ID,
    title: post.post_title,
    description: post.content|striptags|slice(0, 120),
    day: post.course_day,
    start: post.start_time,
    end: post.end_time,
    color: post.course_color,
    room: post.classroom.value,
    teachers: teacher_slugs
}]) %}
And we pass both course data and teacher data as JSON through HTML attributes. This allows JavaScript to access all necessary data directly from the frontend.
data-courses='{{ course_data|json_encode() }}'
data-teachers='{{ teacher_map|json_encode() }}'>
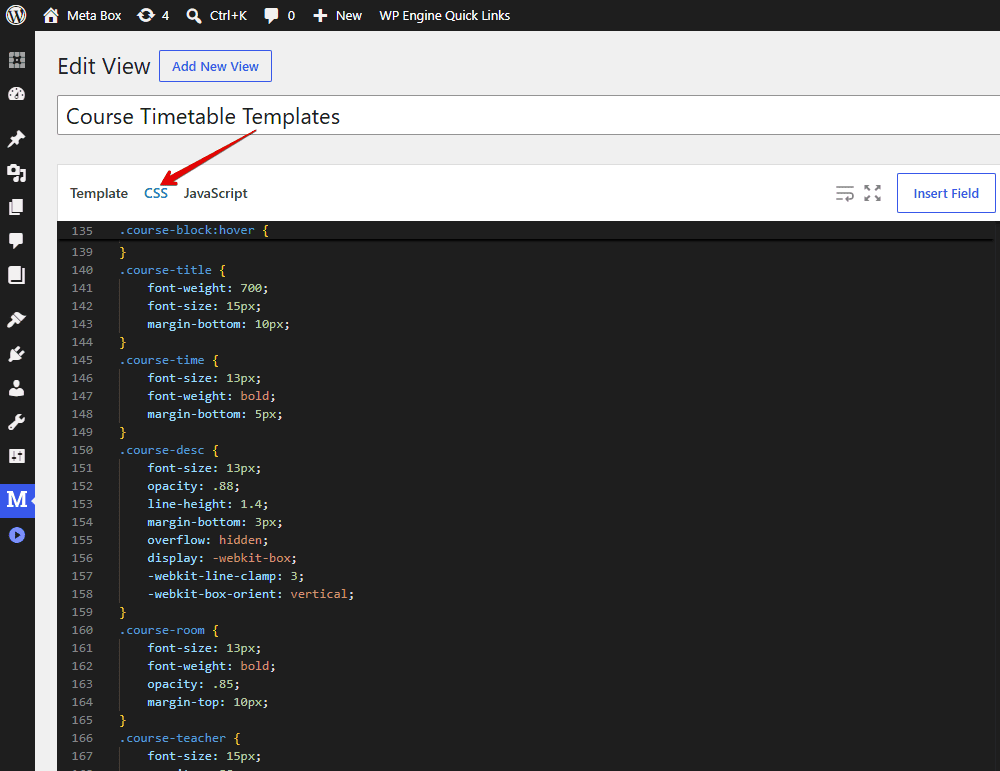
Then switch to the CSS tab to style the timetable.
#mb-course-schedule {
    width: 100%;
    font-family: -apple-system, BlinkMacSystemFont, "Segoe UI", sans-serif;
}

/* ── Filter ── */
.schedule-filter {
    margin-bottom: 16px;
    border-bottom: 2px solid #e0e0e0;
    padding-bottom: 0;
}
.schedule-filter button {
    border: none;
    border-bottom: 3px solid transparent;
    background: transparent;
    padding: 8px 16px;
    margin-bottom: -2px;
    margin-right: 4px;
    cursor: pointer;
    font-size: 17px;
    font-weight: 500;
    color: #666;
    border-radius: 0;
}
.schedule-filter button.active {
    color: #009688;
    border-bottom-color: #009688;
}
.schedule-filter button:hover:not(.active) {
    color: #222;
}

/* ── Grid ── */
.schedule-grid {
    position: relative;
    display: grid;
    grid-template-columns: 80px repeat(6, 1fr);
    border: 1px solid #e0e0e0;
    border-radius: 4px;
    overflow: hidden;
}

/* ── Header ── */
.schedule-header {
    display: contents;
}
.schedule-header div {
    background: #e8e8e8;
    text-align: center;
    padding: 12px 4px;
    font-weight: 600;
    font-size: 17px;
    color: #333;
    border-bottom: 2px solid #d0d0d0;
    border-right: 1px solid #d0d0d0;
}
.schedule-header div:last-child {
    border-right: none;
}

/* ── Time cells ── */
.time-cell {
    height: 30px;
    border-bottom: 1px solid #e8e8e8;
    border-right: 1px solid #d8d8d8;
    padding-right: 8px;
    font-size: 15px;
    color: #999;
    display: flex;
    align-items: center;
    justify-content: flex-end;
    box-sizing: border-box;
}
.time-cell.row-even { background: #ffffff; }
.time-cell.row-odd { background: #f5f5f5; }

/* ── Day cells ── */
.day-cell {
    height: 30px;
    border-bottom: 1px solid #e8e8e8;
    border-right: 1px solid #eeeeee;
    box-sizing: border-box;
}
.day-cell:nth-child(7n) { border-right: none; }
.day-cell.row-even { background: #ffffff; }
.day-cell.row-odd { background: #f7f7f7; }

/* ── Course blocks ── */
.course-block {
    position: absolute;
    color: #fff;
    padding: 8px 10px;
    border-radius: 4px;
    overflow: hidden;
    box-sizing: border-box;
    font-size: 13px;
    line-height: 1.4;
    text-align: center;
    cursor: pointer;
    transition: transform .2s ease, box-shadow .2s ease;
    z-index: 1;
}
.course-block:hover {
    transform: scale(1.04);
    box-shadow: 0 4px 16px rgba(0,0,0,0.18);
    z-index: 10;
}
.course-title {
    font-weight: 700;
    font-size: 15px;
    margin-bottom: 10px;
}
.course-time {
    font-size: 13px;
    font-weight: bold;
    margin-bottom: 5px;
}
.course-desc {
    font-size: 13px;
    opacity: .88;
    line-height: 1.4;
    margin-bottom: 3px;
    overflow: hidden;
    display: -webkit-box;
    -webkit-line-clamp: 3;
    -webkit-box-orient: vertical;
}
.course-room {
    font-size: 13px;
    font-weight: bold;
    opacity: .85;
    margin-top: 10px;
}
.course-teacher {
    font-size: 15px;
    opacity: .88;
    margin-top: 7px;
    text-transform: uppercase;
    font-style: italic;
}
Now, in the JavaScript tab, add scripts to make the timetable interactive.
jQuery(function ($) {
    const $container = $('#mb-course-schedule');
    if (!$container.length) return;

    const courses = $container.data('courses') || [];
    const teachers = $container.data('teachers') || {};
    const days = ['monday','tuesday','wednesday','thursday','friday','saturday'];
    const minH = Math.min(...courses.map(c => parseInt(c.start)));
    const maxH = Math.max(...courses.map(c => parseInt(c.end)));
    const rowH = 30;

    let html = `<div class="schedule-filter"><button class="active" data-teacher="all">All Teachers</button>`;
    $.each(teachers, (slug, name) => { html += `<button data-teacher="${slug}">${name}</button>`; });
    html += `</div><div class="schedule-grid"><div class="schedule-header"><div></div>`;
    days.forEach(d => { html += `<div>${d.charAt(0).toUpperCase() + d.slice(1)}</div>`; });
    html += `</div>`;
    let ri = 0;
    for (let h = minH; h <= maxH; h++) {
        for (let m = 0; m < 60; m += 15) {
            const rc = ri++ % 2 === 0 ? 'row-even' : 'row-odd';
            html += `<div class="time-cell ${rc}">${String(h).padStart(2,'0')}:${String(m).padStart(2,'0')}</div>`;
            for (let d = 0; d < 6; d++) html += `<div class="day-cell ${rc}"></div>`;
        }
    }
    html += `</div>`;
    $container.html(html);

    const $grid = $('.schedule-grid');
    setTimeout(() => {
    const timeColW = $grid.find('.time-cell').first().outerWidth();
    const headerH = $grid.find('.schedule-header div').first().outerHeight();
    const dayW = ($grid.outerWidth() - timeColW) / 6;

    courses.forEach(course => {
        const [sh, sm] = course.start.split(':').map(Number);
        const [eh, em] = course.end.split(':').map(Number);
        const startMin = (sh - minH) * 60 + sm;
        const endMin = (eh - minH) * 60 + em;
        const dayIndex = days.indexOf(course.day);
        if (dayIndex < 0) return;

        const teacherNames = (course.teachers || []).map(s => teachers[s] || s);

        $('<div>', {
            class: 'course-block',
            'data-course': course.id,
            'data-teacher': (course.teachers || []).join(',')
        }).css({
            background: course.color,
            top: headerH + (startMin / 15 * rowH),
            left: timeColW + dayIndex * dayW + 2,
            width: dayW - 4,
            height: ((endMin - startMin) / 15) * rowH - 2
        }).html(`
            <div class="course-title">${course.title}</div>
            <div class="course-time">${course.start} - ${course.end}</div>
            ${course.description ? `<div class="course-desc">${course.description}</div>` : ''}
            ${course.room ? `<div class="course-room">🏫 ${course.room}</div>` : ''}
            ${teacherNames.length ? `<div class="course-teacher">👤 ${teacherNames.join(', ')}</div>` : ''}
        `).appendTo($grid);
    });
}, 0);

    $container.on('click', '.schedule-filter button', function () {
        const teacher = $(this).data('teacher');
        $('.schedule-filter button').removeClass('active');
        $(this).addClass('active');
        $('.course-block').each(function () {
            const list = ($(this).data('teacher') || '').split(',');
            $(this).toggle(teacher === 'all' || list.includes(String(teacher)));
        });
    });
});
Explanation:
jQuery(function ($) {
We wait until the HTML document is fully loaded before running the code.
Then, we look for the timetable container. If it doesn’t exist, the script stops immediately.
const $container = $('#mb-course-schedule');
if (!$container.length) return;
We retrieve the course and teacher data from the HTML attributes that we embedded earlier.
const courses = $container.data('courses') || [];
const teachers = $container.data('teachers') || {};
Next, we calculate the earliest start time and the latest end time among all courses. This helps the timetable automatically adjust its size based on the actual schedule data.
const days = ['monday','tuesday','wednesday','thursday','friday','saturday'];
const minH = Math.min(...courses.map(c => parseInt(c.start)));
const maxH = Math.max(...courses.map(c => parseInt(c.end)));
We define rowH as 30 pixels. This value is used later to calculate the vertical position and height of course blocks based on their time slots.
const rowH = 30;
Next, we build the timetable grid. For each hour, we create four 15-minute time slots, with one time cell and six day cells for each slot.
let ri = 0;
for (let h = minH; h <= maxH; h++) {
    for (let m = 0; m < 60; m += 15) {
         const rc = ri++ % 2 === 0 ? 'row-even' : 'row-odd';
         html += `<div class="time-cell ${rc}">${String(h).padStart(2,'0')}:${String(m).padStart(2,'0')}</div>`;
         for (let d = 0; d < 6; d++) html += `<div class="day-cell ${rc}"></div>`;
    }
}
html += `</div>`;
$container.html(html);
After rendering the grid, we use setTimeout() to delay the positioning calculations slightly, giving the browser time to render the timetable layout before measuring its dimensions.
The final code listens for clicks on the teacher filter buttons. When a button is clicked, we get the selected teacher, update the active button state, and show only the matching course. If users click All Teachers, all courses remain visible.
$container.on('click', '.schedule-filter button', function () {
    const teacher = $(this).data('teacher');
    $('.schedule-filter button').removeClass('active');
    $(this).addClass('active');
    $('.course-block').each(function () {
        const list = ($(this).data('teacher') || '').split(',');
        $(this).toggle(teacher === 'all' || list.includes(String(teacher)));
    });
});
That’s all for the code. I’ve put everything on GitHub, so you can check it out there.
Let’s move to the frontend to see the result. Now the timetable is fully functional, and users can filter courses by teacher easily.
Last Words
With Meta Box, you can easily build a dynamic timetable that is clear, flexible, and easy to filter. Want to explore more ways to build dynamic content in WordPress? Check out our related Meta Box tutorial for another practical example.
- Advanced Map Listings
- Author Bio
- Better 404 Page
- Blogs for Developers
- Building a Simple Listing Website with Filters
- Building an Event Website
- Building Forms with MB Frontend Submission
- Coding
- Create a Chronological Timeline
- Custom Fields Fundamentals
- Design Patterns
- Displaying Posts with Filters
- Download and Preview Buttons
- Dynamic Banners
- Dynamic Landing Page
- FAQs Page
- Featured Products
- Filter Posts by Relationships
- Filter Posts by Taxonomy
- Full Site Editing
- Google Fonts
- Gutenberg
- Hotel Booking
- Latest Products
- Logo Carousel
- MB Builder Applications
- MB Group Applications
- MB Views Applications
- Most Viewed Posts
- Opening Hours
- OTA Website
- Pricing Table Page
- Product Page
- Product Variations
- Querying and Showing Posts by Custom Fields
- Recipe
- Related Posts via Relationship
- Restaurant Menus
- SEO Analysis
- Simple LMS
- Speed Up Website
- Taxonomy Thumbnails
- Team Members
- User Profile
- Video Gallery

 How to Manage & Display Course Schedule With Filters
  How to Create a Team Members Page - P6 - using Meta Box and Breakdance
  How to Create a Simple Listing - P2 - Using Meta Box and Bricks