
Sometimes, your site has sensitive information such as internal notes, user status, or management-related data that should only be visible to specific roles. That’s when you need to conditionally display user profile fields based on user roles in WordPress.

Showing or hiding user profile fields based on roles isn't just about keeping the interface clean. It also helps you build a more secure and efficient user management system.
This approach is especially useful for websites with multiple people involved in content or user management, such as content teams, agencies, or contributor-based platforms.
Before going ahead, let’s check some tools we need for this practice.
Video Version

Before Getting Started
The most important function we need is to add custom fields to the user profiles, then, regulate which fields will be displayed for specific users using PHP code. So, I recommend you use Meta Box AIO in this guide. You’ll have all the advanced functionalities from Meta Box extensions, especially:
- MB User Meta: to create custom fields for users.
- MB Builder: to have a UI in the backend to create fields visually.
It’s time to start.
Create Custom Fields for Users
We have a tutorial about this, so you can refer to it. Here I’ve created a field group already, it’s assigned to the User.
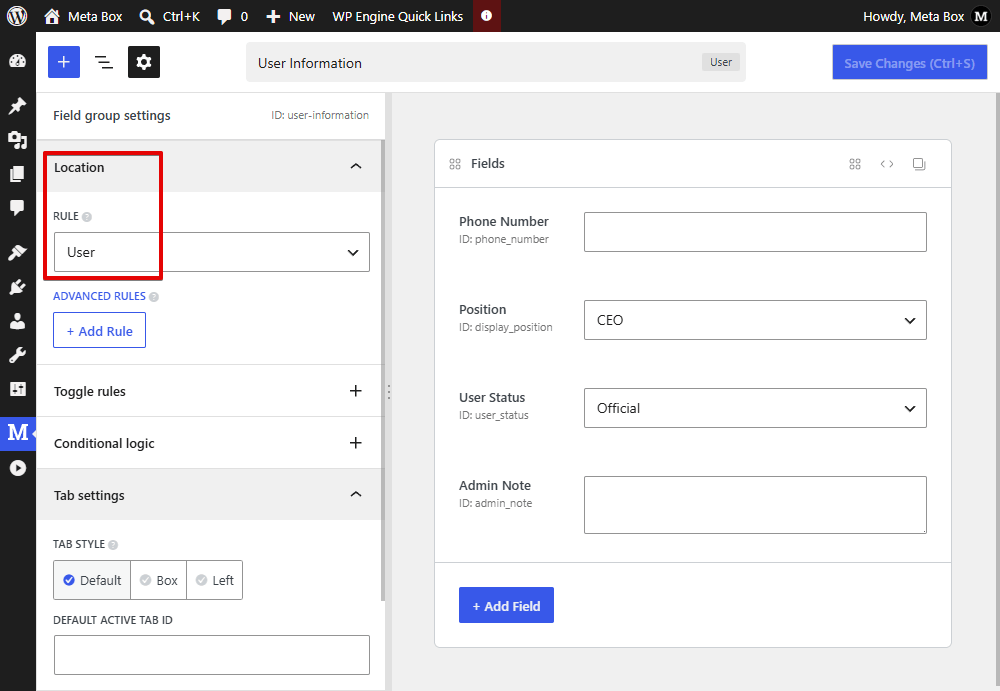
In your case, you can use 40+ field types provided by Meta Box to add fields as you need.
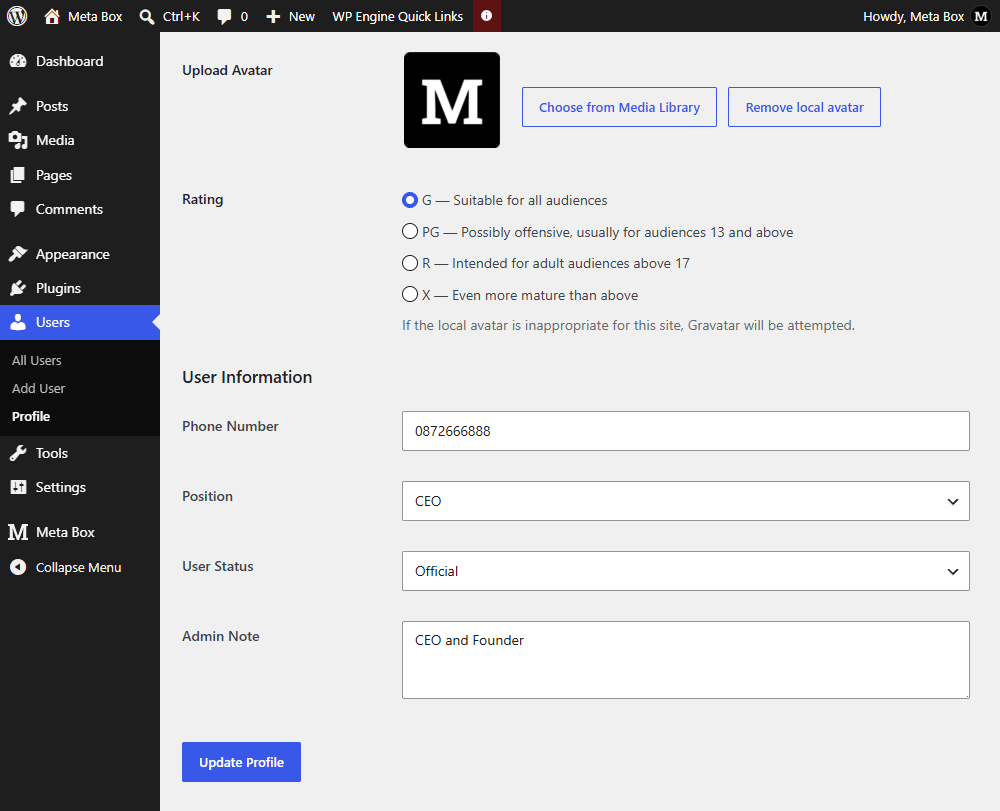
As a result, when you go to the User editing page, you’ll see the created fields. Just enter data for them. Currently, these fields appear on every user's profile, regardless of their role.
Show/Hide Custom Fields by User Role
As I mentioned, we’ll use PHP code for this functionality. Go to your theme file editor to add some code.
add_filter( 'rwmb_meta_boxes', function( $meta_boxes ) {
    $current_user = wp_get_current_user();
    if ( ! $current_user ) {
        return $meta_boxes;
    }
    // the roles is administrator, editor, author, contributor, subscriber
    $field_roles = [
        'admin_note'  => [ 'administrator' ],
        'user_status'  => [ 'administrator', 'editor' ],
    ];
    foreach ( $meta_boxes as &$meta_box ) {
        if ( empty( $meta_box['fields'] ) ) {
            continue;
        }
        foreach ( $meta_box['fields'] as $index => $field ) {
            if ( empty( $field['id'] ) ) {
                continue;
            }
            $field_id = $field['id'];
            if ( isset( $field_roles[ $field_id ] ) ) {
                $allowed_roles = $field_roles[ $field_id ];
                if ( ! array_intersect( $allowed_roles, (array) $current_user->roles ) ) {
                    unset( $meta_box['fields'][ $index ] );
                }
            }
        }
    }
    return $meta_boxes;
}, 20 );
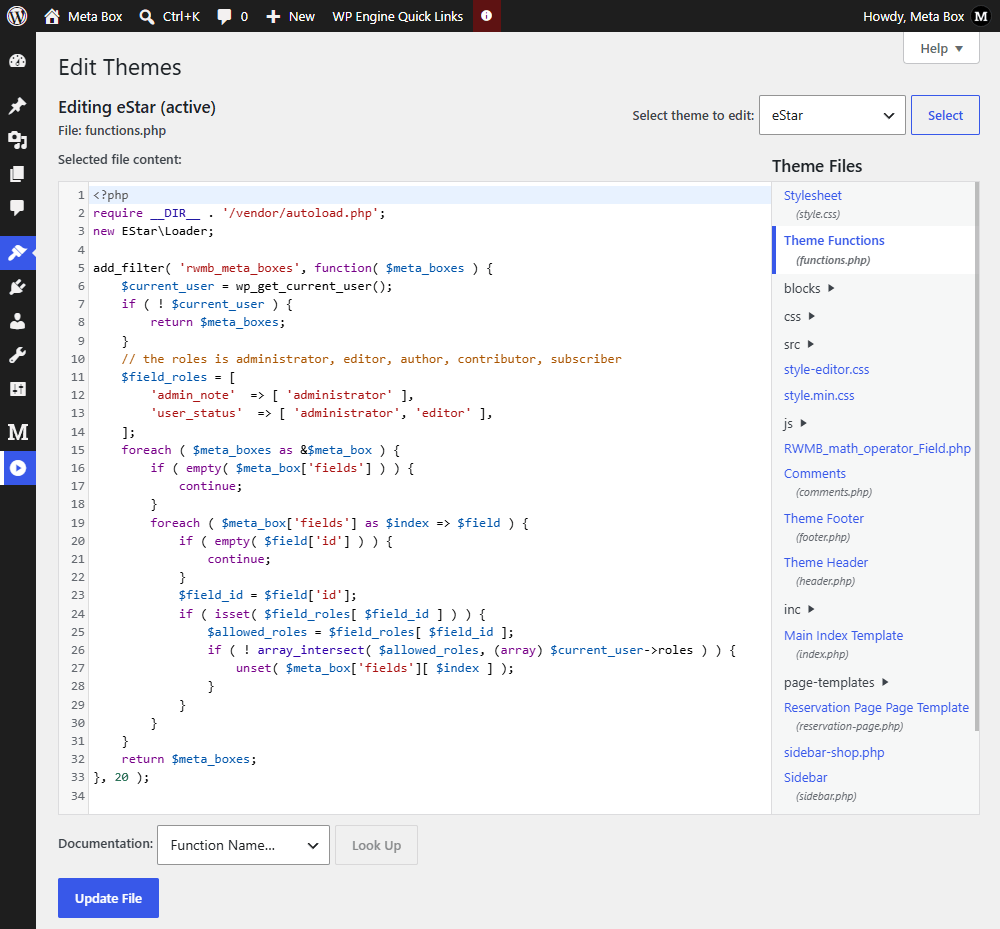
In there:
rwmb_meta_boxes: is a hook to retrieve data from the fields before displaying them.$current_user = wp_get_current_user(): is to get the information of the logged-in user.
// the roles is administrator, editor, author, contributor, subscriber
$field_roles = [
    'admin_note'  => [ 'administrator' ],
    'user_status'  => [ 'administrator', 'editor' ],
];
This is the core logic behind showing and hiding fields by user role. You can change the field ID and the user role. The code is an example; I set the admin_note field displays for the administrator only, and the user_status is shown for both administrator and editor. The remaining fields for all users.
Then, we'll loop through all the meta boxes. For each one, we'll go through its fields and check whether the current user's role is allowed to see them.
Since we regulate the field through its ID, I use $field_id = $field['id'] to get it. And if ( isset( $field_roles[ $field_id ] ) ) { is to check whether it exists in our field-to-role mapping array. If it does, we retrieve the list of roles that are allowed to view that field. Then, we compare those roles with the roles of the currently logged-in user.
The array_intersect() function helps us determine whether the user has at least one matching role. If there is no match, it means the user doesn't have permission to view the field. In that case, we remove the field from the Meta Box configuration before it is rendered on the user profile screen.
Finally, we return the updated list of meta boxes. As a result, users will only see the fields that are available to their roles.
That’s all.
Last Words
With this tutorial, we hope that you can easily control which user profile fields are visible to each user role. It also gives you a flexible way to create role-specific user profiles and show only the information relevant to each group of users.
- Advanced Map Listings
- Author Bio
- Better 404 Page
- Blogs for Developers
- Building a Simple Listing Website with Filters
- Building an Event Website
- Building Forms with MB Frontend Submission
- Coding
- Create a Chronological Timeline
- Custom Fields Fundamentals
- Design Patterns
- Displaying Posts with Filters
- Download and Preview Buttons
- Dynamic Banners
- Dynamic Landing Page
- FAQs Page
- Featured Products
- Filter Posts by Relationships
- Filter Posts by Taxonomy
- Full Site Editing
- Google Fonts
- Gutenberg
- Hotel Booking
- Latest Products
- Logo Carousel
- MB Builder Applications
- MB Group Applications
- MB Views Applications
- Most Viewed Posts
- Opening Hours
- OTA Website
- Pricing Table Page
- Product Page
- Product Variations
- Querying and Showing Posts by Custom Fields
- Recipe
- Related Posts via Relationship
- Restaurant Menus
- SEO Analysis
- Simple LMS
- Speed Up Website
- Taxonomy Thumbnails
- Team Members
- User Profile
- Video Gallery

 How to Add Guest Authors and Guest Posts - Using Meta Box
  4 Steps to Create Survey Forms in WordPress that Only Certain People Can Access
  How to Create Your WordPress Custom User Profile Page on Frontend